


Atomic
-
Posts
52 -
Joined
-
Last visited
Content Type
Profiles
Forums
Events
Gallery
Store
Posts posted by Atomic
-
-
Oh yea, I remember being very impressed by the parts you made!
I wouldn't put the rubber bushing included on the load side of the stud, I may just use it on the top. Like you said there probably isn't room for the included bushing + my kit.
-
IMO there was nothing to keep the shock stud perfectly centered in top bracket. I don't know if that would be a problem or not over time. I just didn't the idea of the front of my 5000lbs truck being held up by two 3/8" studs if there is a possibility of them moving around in a .800 hole and possibly being weakened because they are not perfectly centered in the bracket causing metal to metal contact between the stud and hole in the bracket.
Also the bushing he sells have to be very hard to support the weight of the vehicle without distorting. With the bushings as hard as they are IMO unless the shock stays perfectly perpendicular to the top bracket I also felt that it might side load the bushing one way or the other causing some stress on the stud.
I don't know if any of those things are issues or would actually cause any problems over time. I've never heard anyone having a problem. I'm a aerospace machinist though and it probably makes me a little more picky than most people. In any case for those reasons, unless your trying get your truck as low as possible, for me I like the other two setups he sells more than the stud type.
Hey, I just wanted to drop in to give more info. I am sorry you arent happy with the stud bushing setup, and if you want to send it back I will give you a full refund for it. I do not believe using the stud top poses any risk at all. The way I made the stud bushing washers it is basically fixed between the gussets of the upper bracket and the side of the frame shock hoop. Here is a picture so you can see what I mean:
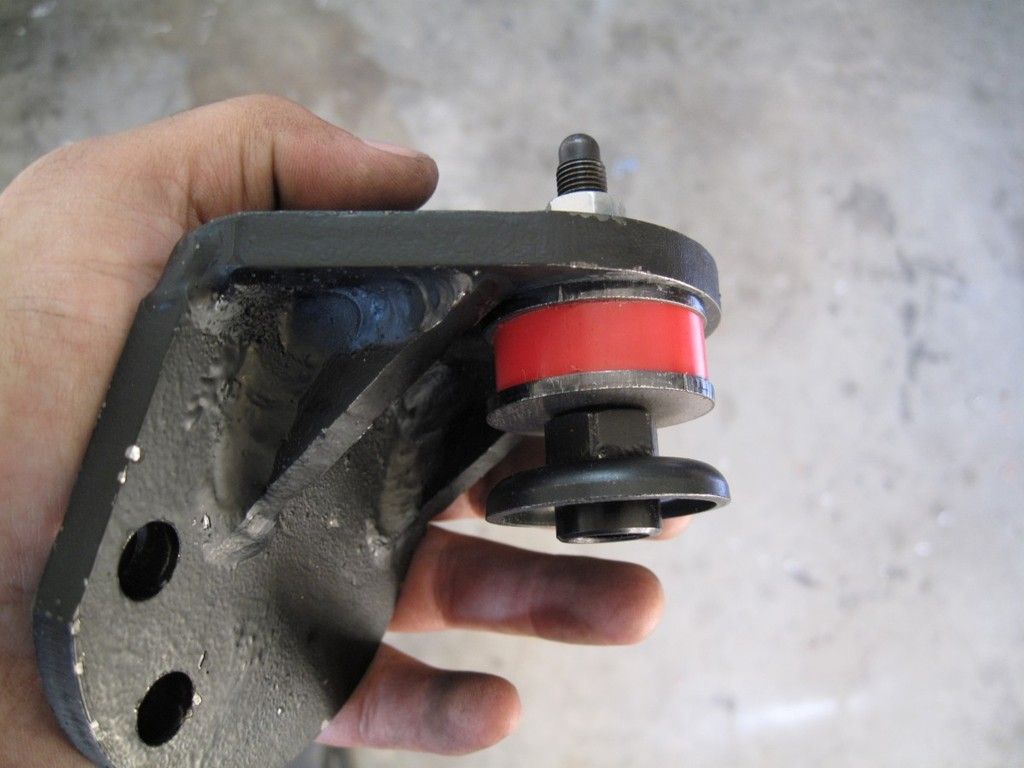
The washers are also slightly oversized so the bushing material does not overflow the washers. You are correct the bushing material is very hard, it is actually 95A on the durometer scale, somewhere between a car tire and a golf ball. Something in the 80A-90A range might be better but I was more worried about it giving too much vs not giving enough.
The angle of the bracket puts the shock perpendicular to the shock at the mid-travel position. The angle of the stud will change with the motion of the wheel, but this is a very small amount in reality. I recommend using the rubber bushing included with the stud top for the top so the stud can articular some. The washers are a tight fit for the stud and if you look at the picture the washer sits on top of the nut at the bottom of the stud so it is supported there and not just on the shaft.
With all that in mind, I have sold probably a dozen of the bushing kits and never had a complaint and certainly not a failure. The stud top option is most useful for super-low setups and mid travel setups would really be fine with the stud top or the procomp mount. My reason for making it was to put the option out there for the guys that wanted a 4"+ static drop with this swap, but its just an option of course.
I appreciate feedback though and am always trying to think of ways I can improve the design or add features.
Thanks,
Richard
-
I still make these if there are any new takers! Feel free to email me at [email protected] with any questions
-
I think I got a lid off ebay for $12 or something
-
I updated the links in the first post and also added an updated spreadsheet I made to help pick out shocks and springs. I am still making these so let me know if anyone is interested via a PM here or shoot me an email at rkwayne at gmail dot com. Thanks!
-
Well with all stock componenets its generally a 3-4" drop, but the swap can be combined a drop spindle to go a little lower. Its not going to be slammed but the cv will be pretty negative.
-
Edit: I updated my PDFs to include details on the lifted-style upper mounts. This is the same document as before with some additions to include more information.PDF Explaining the swap: http://www.mediafire.com/view/vkzapsyvtwu5rv9/coilovers_about_v12.pdfPDF Explaining the installation process: http://www.mediafire.com/view/35n4kssw5cy4ddg/coilovers_install_v12.pdf
-
I frequently get the most questions regarding what shock and spring to use, so I made a spreadsheet to try and simplify the process. I attached it to this email. Feel free to PM me if this doesn't fully answer any question you have, but it should give you a good idea.
Let me know what you guys think!
I still have sets for sale! PM me if you want some!
Thanks,
Richard -
Haha thanks!
I have plenty of these kits ready if any of you guys want to try the swap!
-
My callies rods/crank and weisco piston setup has been very tough. Dont spin a stroker to the moon and make sure the tune is good and it will live fine before you start lifting the heads around 1000rwhp.
-
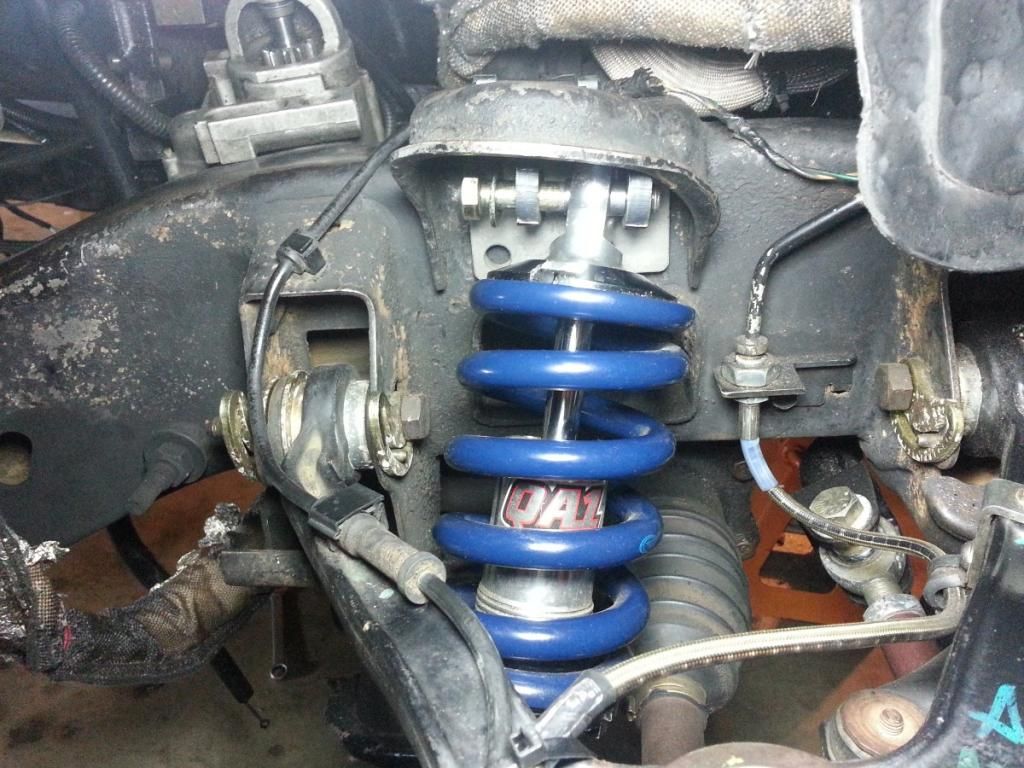
Ok so I got the new new uppers in and tacked them together to mock up. Literally moved it as far over as I could. It gained approximately 3/4" of an inch more clearance from the UCA and raises the mounting point 3/4" from using the procomp adapter. The only bad thing is these will not work with the factory shocks, so if you decided to go back to stock you will need to remove these first. These should let lowered guys use the next size up in shock, or go approximately 1.5" lower.
 I dont have them fully welded yet or powdercoated, but hope to by the end of the week. I would really like someone that has a 6" lift to test these before I order more to make sure they work. I only bought enough to make 3 sets. PM me if you have a 6" lift and want to try them, and Ill give you a discount ;)
-
-
It should be a straight forward swap, especially if you still have the 60e transmission.
You will need to cut a hole in the floor and use the shifter lever and linkage if you want the manual shift one. If you use the electronic you may need to replace the switch on the dash.
The part time 4wd systems also use a different front axle that uses a actuating pin to engage the front axle. I dont think the AWD trucks have this.
-
-
-
-
I have done it both ways, and both work fine, except if you actually have AC I would not recommend that way since the system can over pressurize without it. I put mine on a switch, but forgot to flip the switch back once. I use the EGR method currently.
-
Ride quality is much improved, especially if you compare to a similar height lowered setup. It should only take about an hour or two to install with the uppers taking the majority of the time. Total swap shouldnt be more than $750 or so depending on parts and where you buy.
-
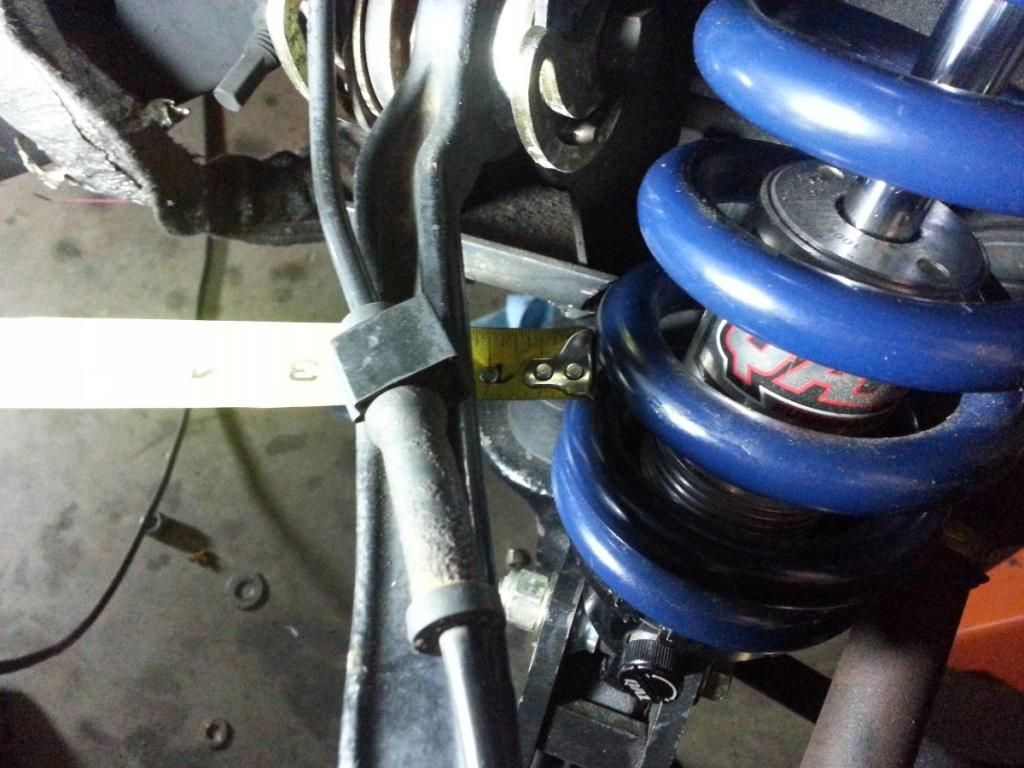
Looks good! Be sure to install and set the bumpstops!
Also did you trim the corner piece off? Doesnt look like it in the photo and its needed so it wont rub...
I would start the shocks at level 12 and tweak up or down from there.
-
Should recieve some more cut pieces today to weld up about 10 more sets! Let me know if anyone else wants to try this swap!
-
Not many options available actually...I dont know if anyone makes a poly mount, and you dont want solid mounts.
-
A BOV only is active when you let off the throttle...my point is you dont really care about performance when you arent in the throttle. If you mean performance of the valve, it will work the best with the most pressure difference., in which case there isnt much difference between the inlet and atmosphere. I would personally vent to atmosphere.
-
Fender height is actually 33"
-


99-07 4WD Front Coilover Conversion
in Suspension & Brakes
Posted
I just wanted to let everyone know that I do still make these brackets and I finally made a website. You can order directly through there, or email me at [email protected] and I can get you taken care of! I also offer custom aluminum tanks and remote tuning if you are interested. My website is www.atomicfabandperformance.com