


Tyson1972
-
Posts
365 -
Joined
-
Last visited
-
Days Won
1
Content Type
Profiles
Forums
Events
Gallery
Store
Posts posted by Tyson1972
-
-
Yes the injectors are stock ISS injectors. But I would like to know what cam I should run and what else I need to upgrade.
-
Thanks alot for the info Zippy, got alot of plans for my truck and it sounds like you are the guy who could help me. Hey by the way what came do you think I should go with. I want to use it as my daily driver and I'm going to run the Circle D 3000 stall converter. I want to use the stock injectors, intake, heads, and bottom end.
-
No problem man, I would also like to get more SS guys down this spring too. So if you know anyone else who would like to attend a get together this spring let me know. We could all meet at my house and drive down to Rockingham from here, because it's only like 45 minutes from here.
-
U.S. Army 82nd Airborne E-5 from Jan 2005 to Aug 2011, 3 combat tours 2 to Afghanistan and 1 to Iraq. Medical Discharged for my back and left knee.
-
Thanks Zippy, I checked iot out and its a 4L65E.
-
It's a all day Street Legal Drag and Test and Tune. Check out there schedule on there website @ Rockingham Dragway.
-
I'd like to run the 1/4 all I've ever been to was in greensboro @ peidmont....best was 8.65@78
The Rock is a 1/4 track.
-
bare with me here as this is my first how-to post. i know this isn't a highly complicated task, but just figured i would offer some information for people out there wanting or needing a little info. also, my apologies for the iphone pictures. the camera was having some issues.
you will need:
- jack/jack stands
- metric socket set
- sawzall
- several sawzall blades
- anti-seize
- wd-40
- spark plug tool
- zip ties
- an accomplice
you may want:
- paint stripper
- high temp paint
- toothbrush
- paintbrush
- sandpaper
as i am in college right now, money is very tight. i decided to do my exhaust on a budget with the goal of having a good sounding and performing exhaust that will last for under $800.
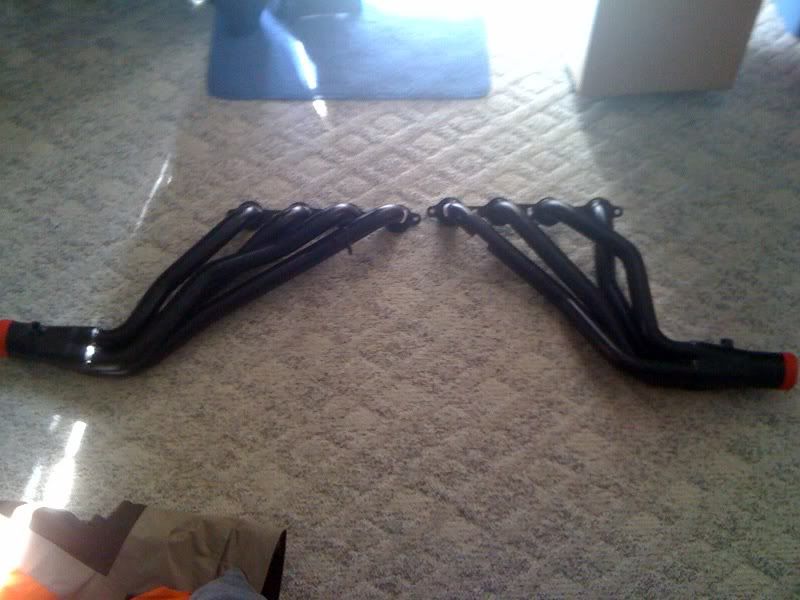
for headers, i ordered these Pacesetter LTs from summit racing.
the factory paint on the pacesetter headers is awful. it even comes with a sticker on it saying that the paint is not intended for high temperatures. that being said, the headers need to be either sent off to be coated or painted with a paint that can hold up to the heat. i decided to paint mine myself. you'll need to pick up some paint stripper from a paint or hardware store. i picked up a spray can of tal-strip II from a local paint store for $7.43.

the directions say you'll need a putty knife, but all you really need is an old rag and toothbrush. really simple - spray on, wait a minute or two, wipe off.
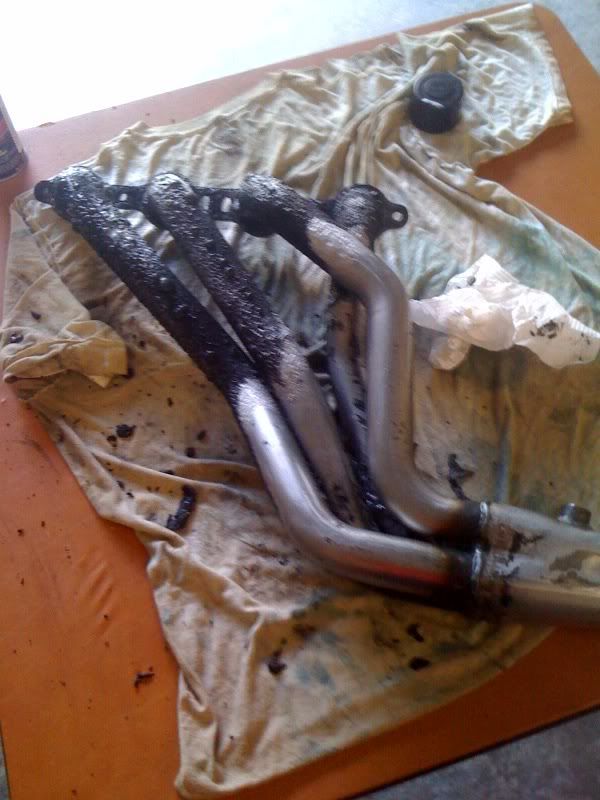
the paint stripper makes the paint bubble up. it really almost peels itself off. use the toothbrush to get into all the tight areas, making sure to remove all the old paint, as it will flake off later if you don't.
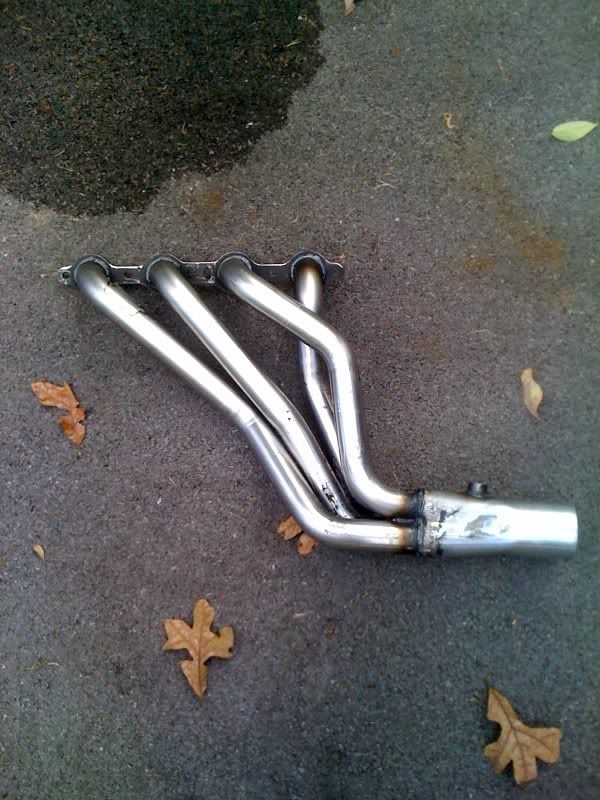
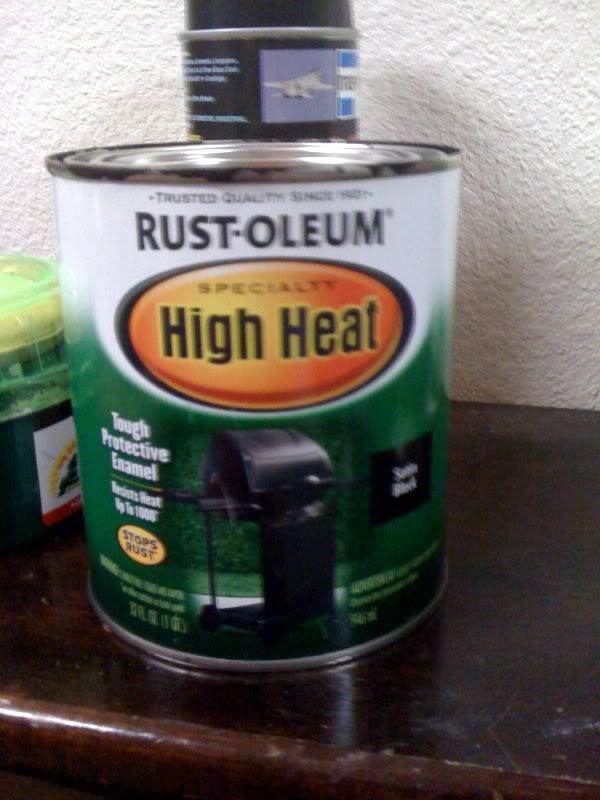
after all the paint is removed, spray the header off with water to make sure all the old gummed up paint is out, then dry with a towel. when the headers are completely dry, go ahead and hit them with some 100 grit sandpaper so the paint will take better. as is with paint stripper, there are several high-temp paints out there. i would recommend staying away from rattle can and getting some brush on, as it seems to hold up better over the long run. i picked up some rust-oleum high temp enamel paint from lowe's for around $12.
yet another simple step - brush the paint on, covering the entire header, and give it adequate time to dry before installing.
when the time comes to install the headers, before you grab your sawzall and start hacking, disconnect the negative battery terminal. i know this is common sense, but i didn't think about it when i was installing and my battery ran down. this led to confusion when installing the new retuned pcm because we didn't know the battery was dead and thought it was the computer causing things to go crazy.
lift the front of the truck high enough so that the front tires are a few inches off the ground and put it on jack stands. make sure you have plenty enough room to slide the headers in from the bottom.
the o2 senors are susceptible to stripping when removing from the exhaust pipe, so soak the outside with wd-40 in order for them to come out easier. do not take them out now as you can do this later out from under the truck. spray down the manifold bolts in wd40 also for and easier removal. i drove around to get the truck warm before removing anything and this seemed to help - everything came out easy.
gently break loose the manifold bolts to make sure none break off in the block. the driver's side rear bolt is the most difficult to get to. you'll just have to play around with it to find the right angle and extension to use. taking the engine cover off also makes things easier for the hard to reach bolts. next, unhook the plug wires and get them out of the way. after all the bolts are broken loose and plug wires unhooked, unplug the front o2 sensors wiring, but do not remove the actual o2 sensor from the pipe. take a sawzall and cut directly behind the catalytic converter on each side. good blades come in handy here. we had a hard time cutting through the factory pipe and used up probably 6 or 7 blades. the hardest part will be cutting the passenger side because of the tight space you're in. once you get through the pipe, remove the bolts from the manifold and catch the 3 metal gaskets. these will be reused later. remove the manifold, downpipe, and cat all in one piece like so.
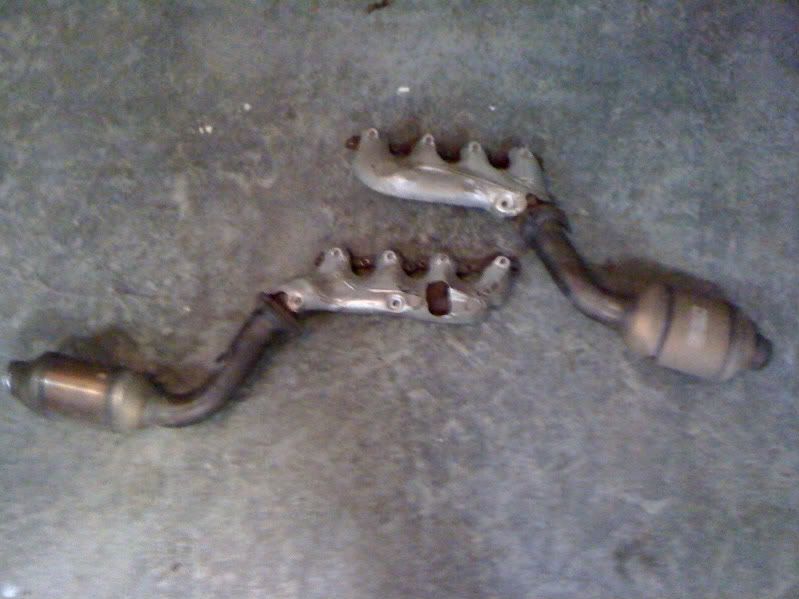
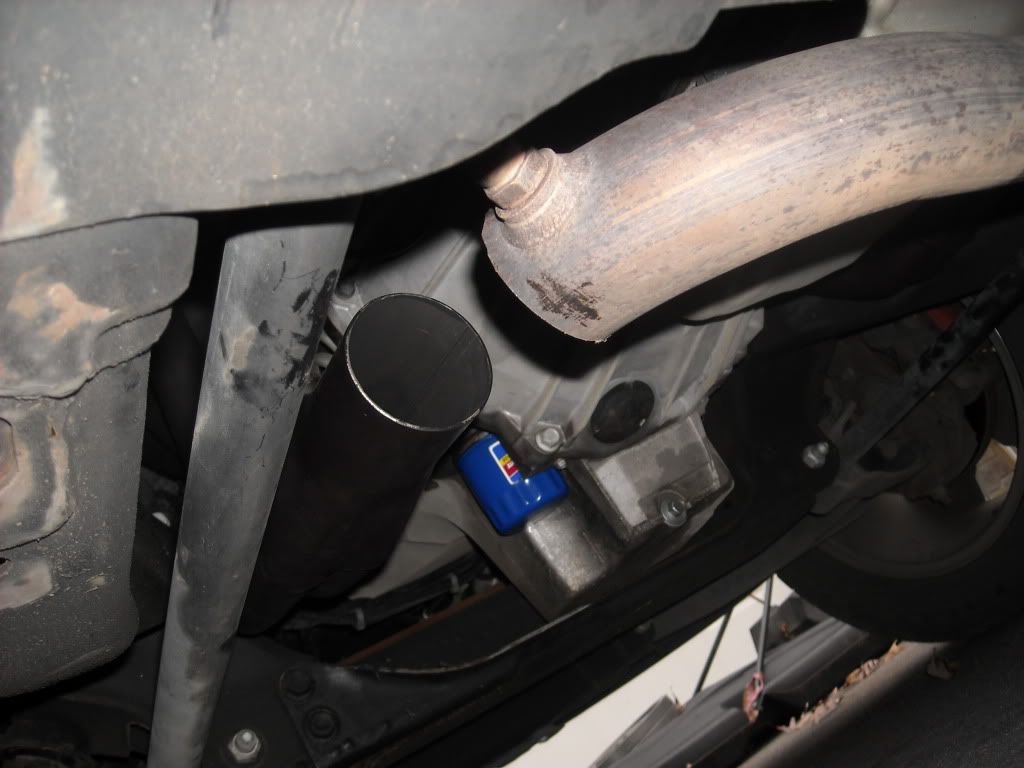
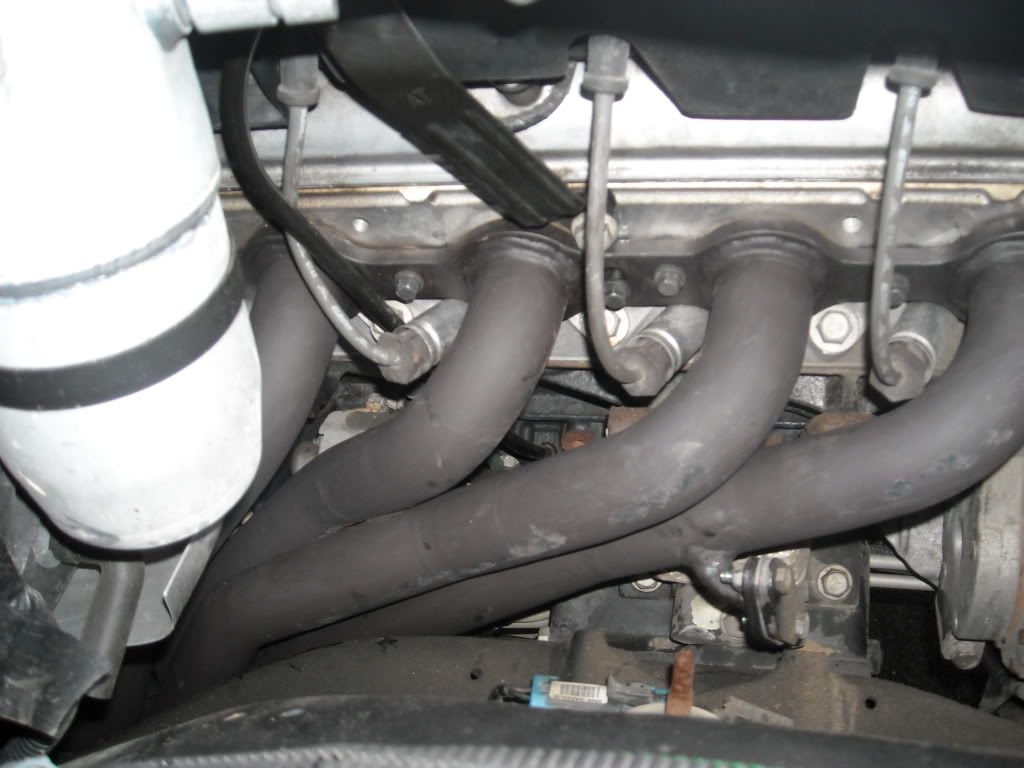
all this together is slightly bigger than the header itself, but still comes out very easily. once you have this out with your o2 sensors still in them, place the pipe in a vice or something that will hold it steady. very, very gently turn the o2 sensor and remove it from the pipe. spread some anti seize on the threads and then screw it gently into the bung in the header. make sure the o2 sensor is in the header tight to prevent leaks. take the header from the under the truck and slide it up into place next to the block. slide the stock gm gaskets into place and then bolt up the headers. use anti seize on the bolts as well. tighten from the center out. once you have the headers bolted up, plug in the o2 sensors. the pacesetter kit comes with all sorts of extensions for wiring but i didn't have to change anything at all. when everything is bolted up, you should have about a 3 to 4 inch gap from the header to the midpipe on either side.
reconnect the plug wires, making sure that none of them are touching the headers. all the factory plugs and plug wires clear on the passenger side with ease.
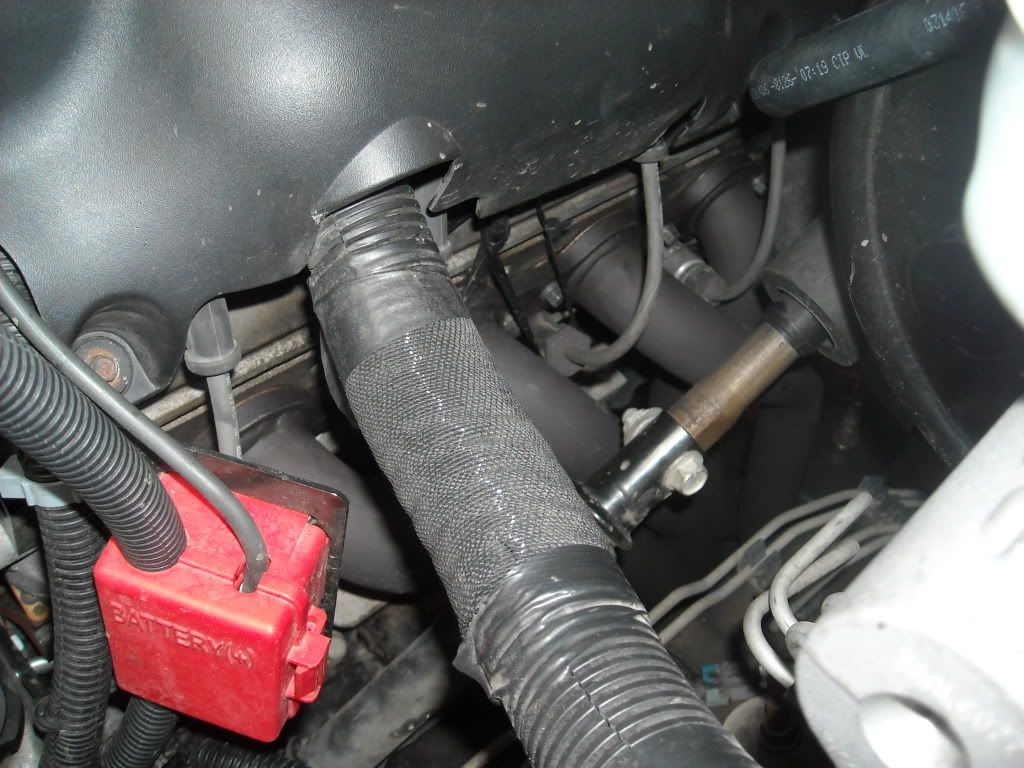
i had to do a little work on the drivers side plug wires. the third plug wire back was rubbing on the header. this obviously is a great way to burn a plug wire, so for the time being i zip tied it to where it had plenty of clearance.
double check your plug wires and o2 sensors to make sure everything is plugged in correctly and nothing is rubbing. install the new tuned pcm (if needed), reconnect the battery, and crank it up. you will more than likely get some smoke to start off with for a minute or so where the paint is getting hot for the first time. check for leaks off the primaries and makes sure all the bolts are tight. you will want to tighten them again after a heat cycle. as is with anything new, a test run is always good (and fun)...so take it down the road and make everybody's ears bleed to the lovely sound of your lq9 with open headers.
Conclusion and Price Totals:
as mentioned before, this was a budget exhaust build with a goal of having a good sound and performance while staying under $800.
Pacesetter LT Headers - $292 + shipping
Rust-Oleum High Temp Paint - $12
Tal-Strip II Paint Remover - $8
Muffler Shop to connect headers to midpipes - $50
Pre-existing exhaust setup:
- 2 Flowmaster Super 40 Series mufflers - $200
- 3" pipe ran out the back with stainless tips + labor - $175
GRAND TOTAL: $737
i know this setup won't give me the same horsepower and torque numbers as a dynatech system hooked to a corsa sport exhaust or anything like that, but you cant beat a complete exhaust from the headers back using all new parts for under $800 imo.
...just as a side note - i was expecting this to be a much harder task than what it was. i know each truck is it's own animal, but the pacesetters fit perfectly to mine, thankfully. i couldn't have asked for a better fit.
big thanks goes out to my friend dave (daves 76 rs on nastyz28.com) for helping with the install. he's in the process of doing an ls1/4l60 swap in an 82 monte right now.
here are some before and after videos.
Hey man thanks for posting this thread, you made my install job a little easier. But I have to but on some spun cats because I live in North Carolina and we have to have them and I am going with magnaflow bullet mufflers.
-
That would be fun! I'm about 2 hours away in martinsville va. When were you thinking?
Maybe some time this next spring at The Rock. I'm going down on Nov.19th with the family to get some base runs down and get back in the groove, since I haven't raced for like 5 years now. But it's just like riding a bike you never forget. I have just been doing alot of stop light to stop light stuff, lol. I'm hoping for something in the 14's, all thats done to the truck is a K&N Cold Air Intake and true dual flowmaster setup. I have noticed that it doesn't have a govenor limiter on it, but it may have came that way since it's a 2006 Intimidator SS 2WD.
-
You have to have the pipes from headers back custom made. There isn't any bolt on for it. As for the O2's, you don't look for longer wire O2's, look for plug in extensions. Check Speartech or Casper electronics for O2 extensions.
Thanks for the info Zippy, I just came across a How-To about putting on a set of Pace Setters and the guys is saying that the stock O2 sensors will work without extensions,
-
Anyone out there want to get together for a Eastern North Carolina SS Meet, we could do it down at the Rockingham Dragway.
-
Thanks guys but I found out through my owners manual that it is a 4L65E.
-
Hey guys need some help installing my Pace Setter headers. 1st is that I cant find a slip fit catted H pipe to fit my truck. My truck is a 2006 ISS it has a true dual exhaust setup on it but it's only 2 and 1/2 inch I want a true dual 3 inch set up will I have to make one. 2nd is were do I get extented O2 sensors for these headers.
-
Yes I bought it used but it's all stock exept the K&N filter charger kit. It does have a true dual flowmaster exhaust.
-
Thanks for the info guys everyone I have talked to say it's a 4l60E but that filter and gasket kit won't fit my truck.
-
I owen a 2006 ISS truck and need to know how I findout what trans I have in my truck.
-
I have a 2006 SS 2WD Intimidator and would like some help finding out which transmission is in my truck.
-
Hood is Sold
-
Do you still have the converter.
i have a yank 3200 stall about 1000 miles on it for a 4l60e 575$ shipped
-
Do you want to sell that hood or not? I cant ship a product that i dont have. According to many companies that sell hoods when they do charge for hood shipping it is no more than $125. So based on that I would offer you $450 shipped.
Ok man here is the deal shipping to you will cost me $200 I will not sell the hood for 250 if you have read any of this post I WILL NOT PAY FPR SHIPPING, the hood is a GoodMark Hood not a cheap knockoff. If you can by one for cheaper then do so. I will not go lower on the price. I have two guys who are wanting the hood, one from West Virgina and one from Pennsylvania. So I am going to sell it to one of them and I will meet one of them in distance so they can get the hood. And second I am not a company, I'm just a seller of a hood. If you can find cheaper shipping from here in North Carolina area code 28376 then cool but I couldn't.
ft sill
Ok got you, sorry thats too expensive for me to ship to.
-
Im Interested. Send me 3 quotes shipped the cheapest way to 67467. I would have it shipped to a business so there should be a discount. If you can get me a good freight costs I may be willing to meet you on a price for that hood.
t
Sorry man you need to find out shipping prices.
-
Damn i was there just last week.
Were you located at.
-
Im interested and sent you a pm
Problem is it will cost to much to ship it to you unless you can find someone cheaper. The cheapest I could find was $350.00 my zip code is 28376 thats in North Carolina. I am not going to pay for shipping so you would need to pay for it. If you can find a cheap shipping place I will gladly ship it to you.
-
i can get one for 350.00 locally!!
Then buy it this one is a Goodmark hood if you can get a Goodmark hood then prove it and buy it.
Wilmington Nc
in Events, Gatherings, & Rallys
Posted
I do, I live in Raeford NC. I'm going to Rockingham on the 19th of Nov.