


MID12sSSS
-
Posts
3,024 -
Joined
-
Last visited
-
Days Won
9
Content Type
Profiles
Forums
Events
Gallery
Store
Posts posted by MID12sSSS
-
-
Started the day gutting all the transmission cooler lines and throwing them out into the snow. Lol.
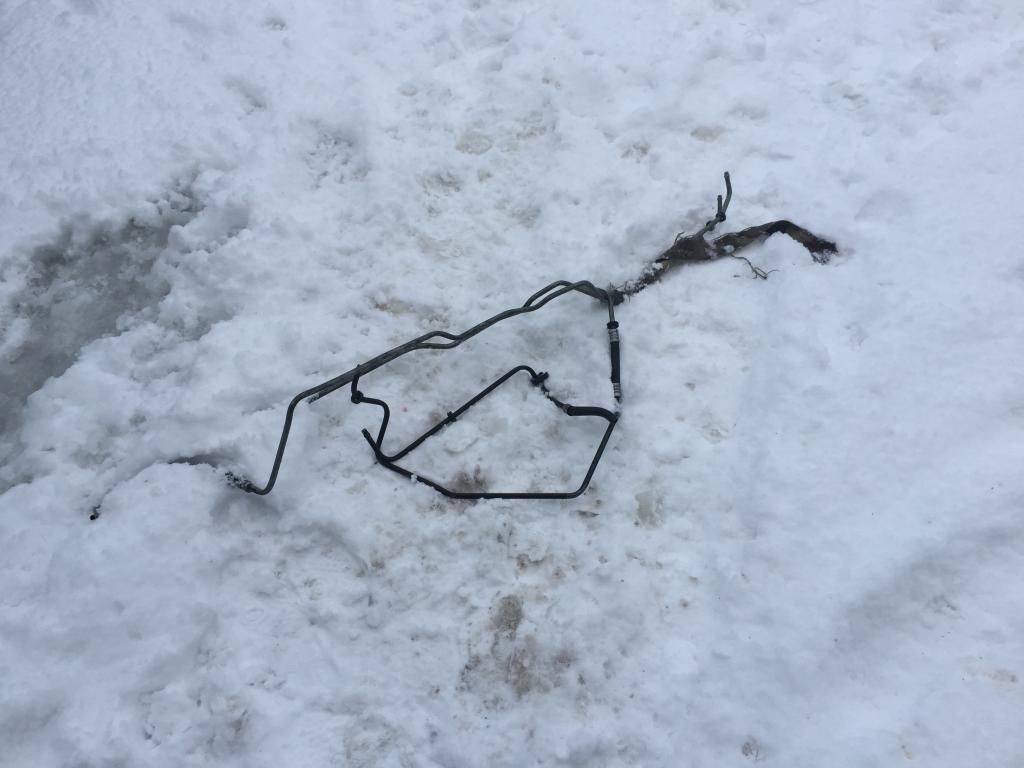
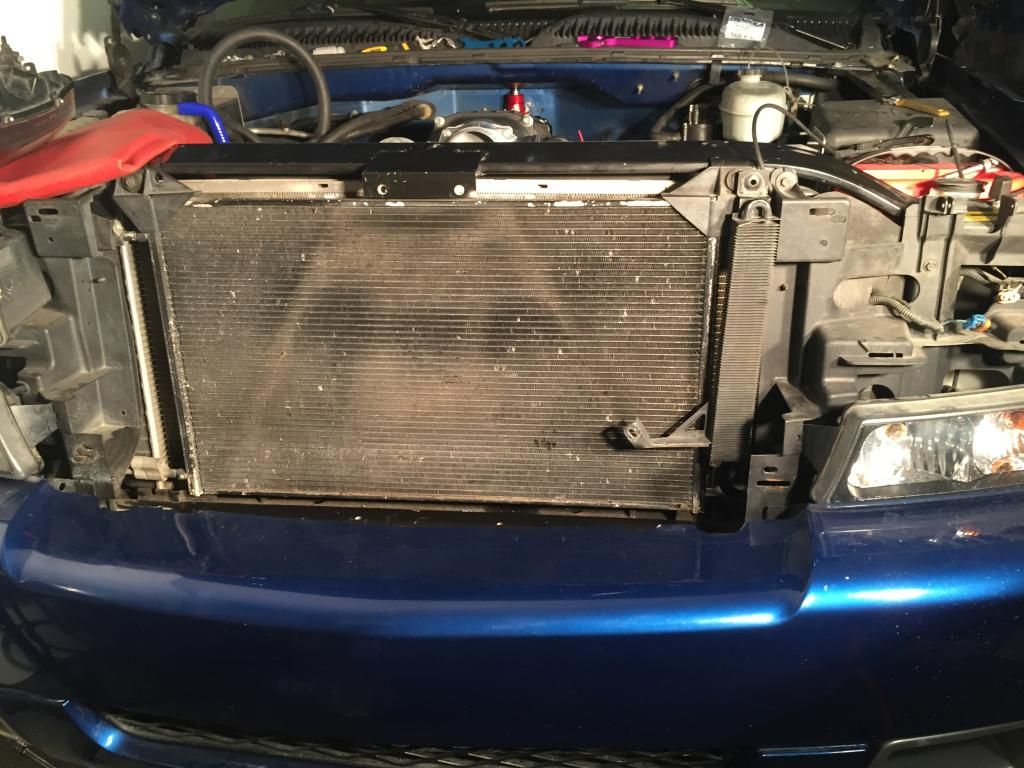
Then pulled the stock transmission cooler and both heat exchangers.
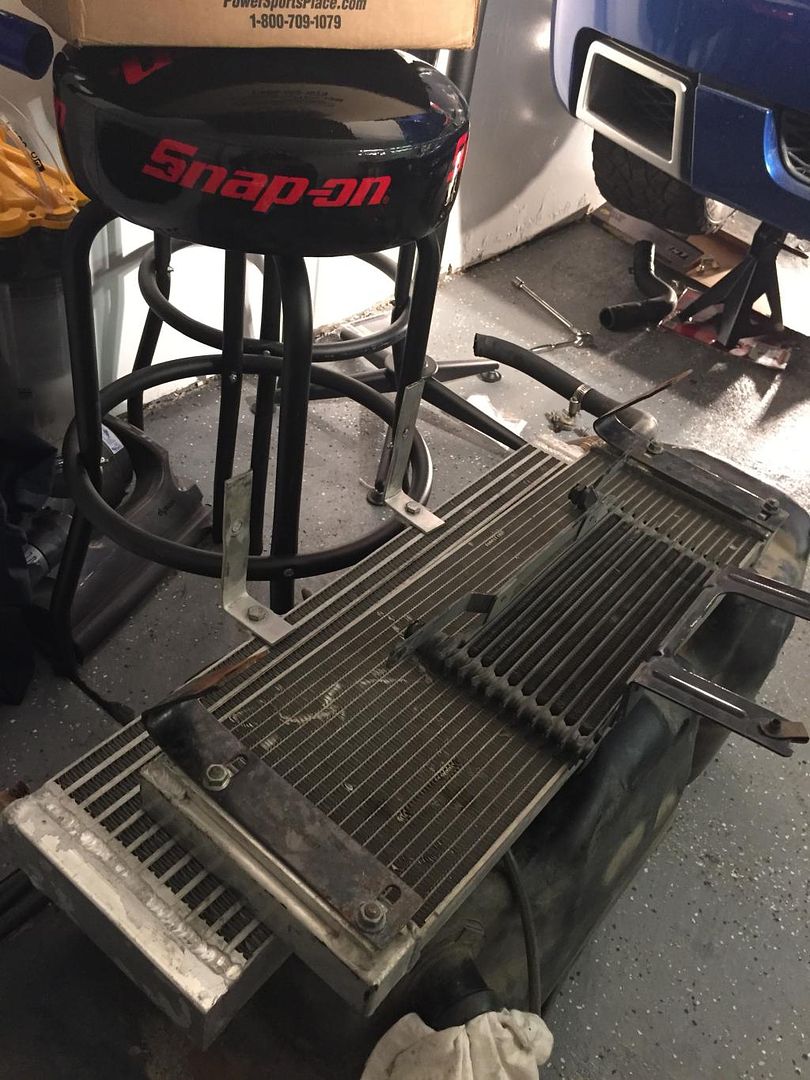
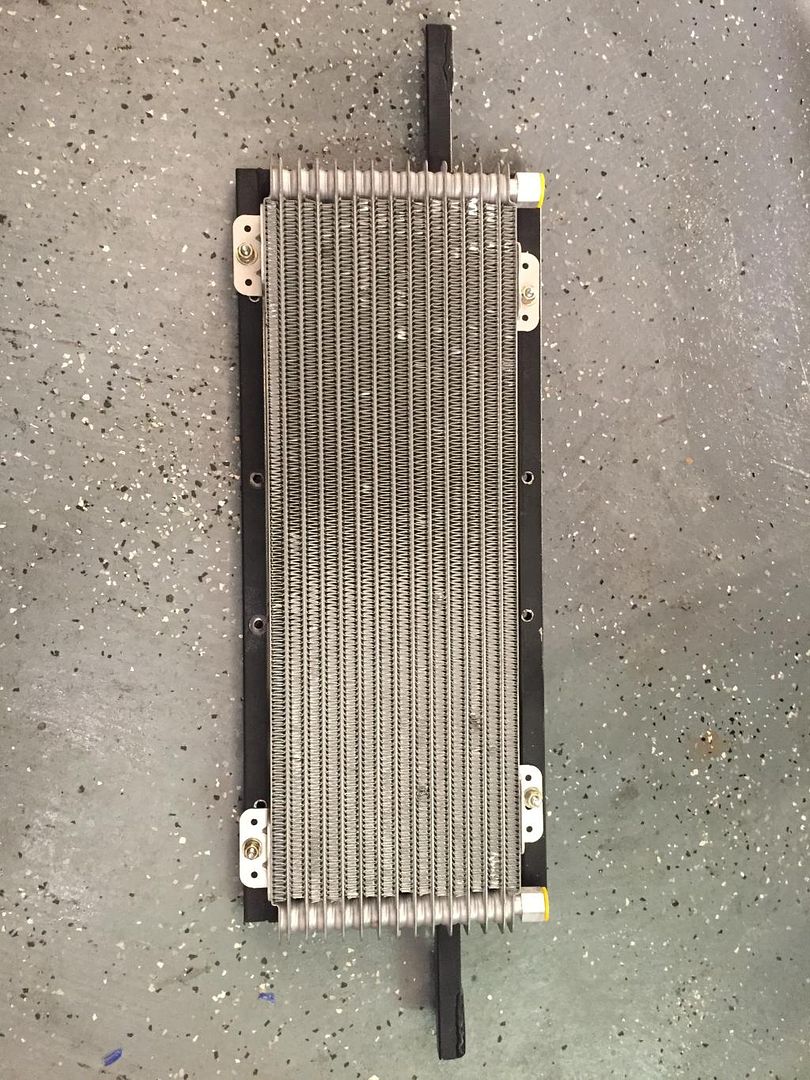
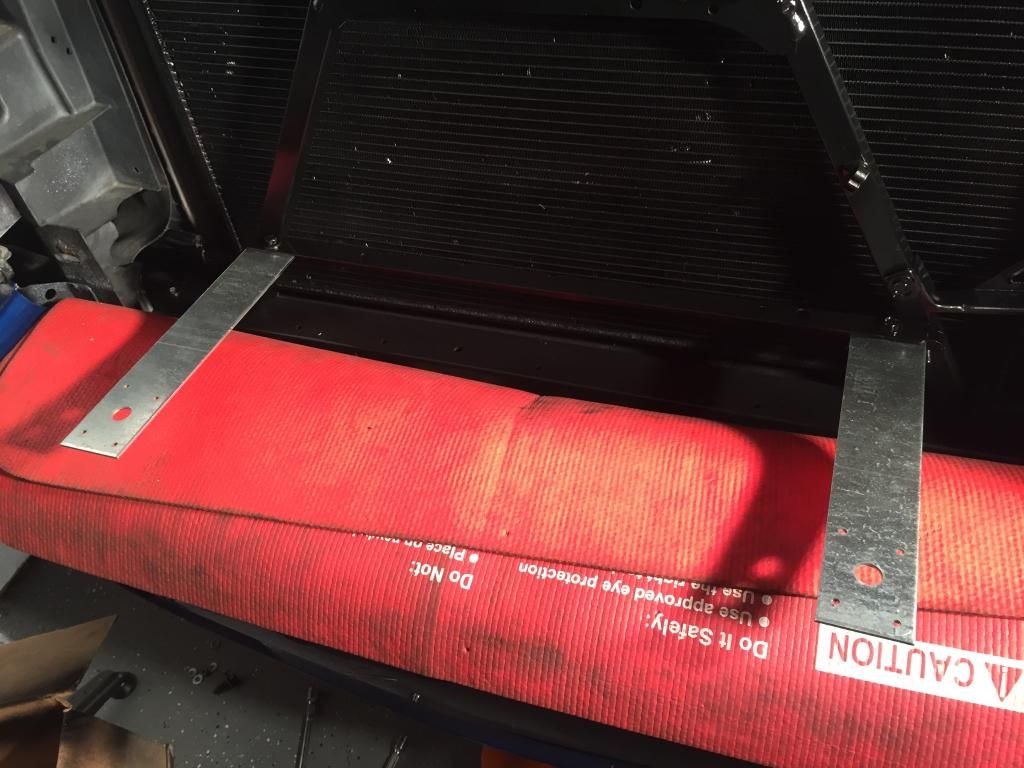
Heres the new 40k cooler and custom bracket
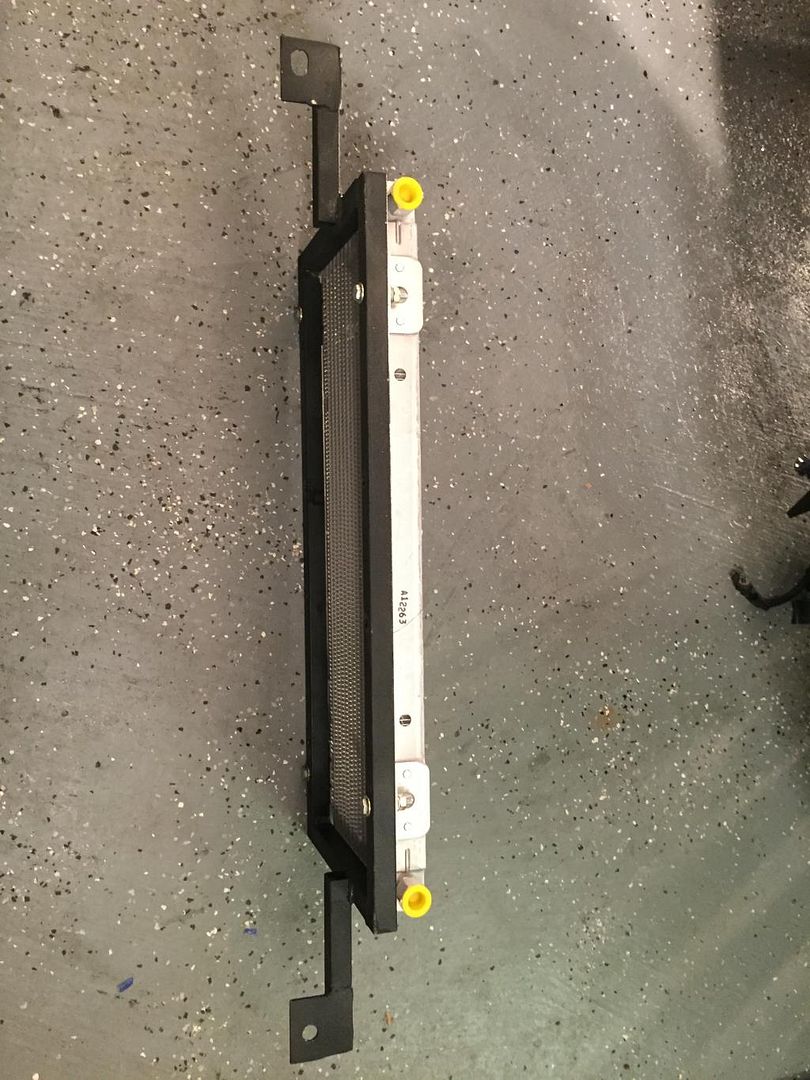
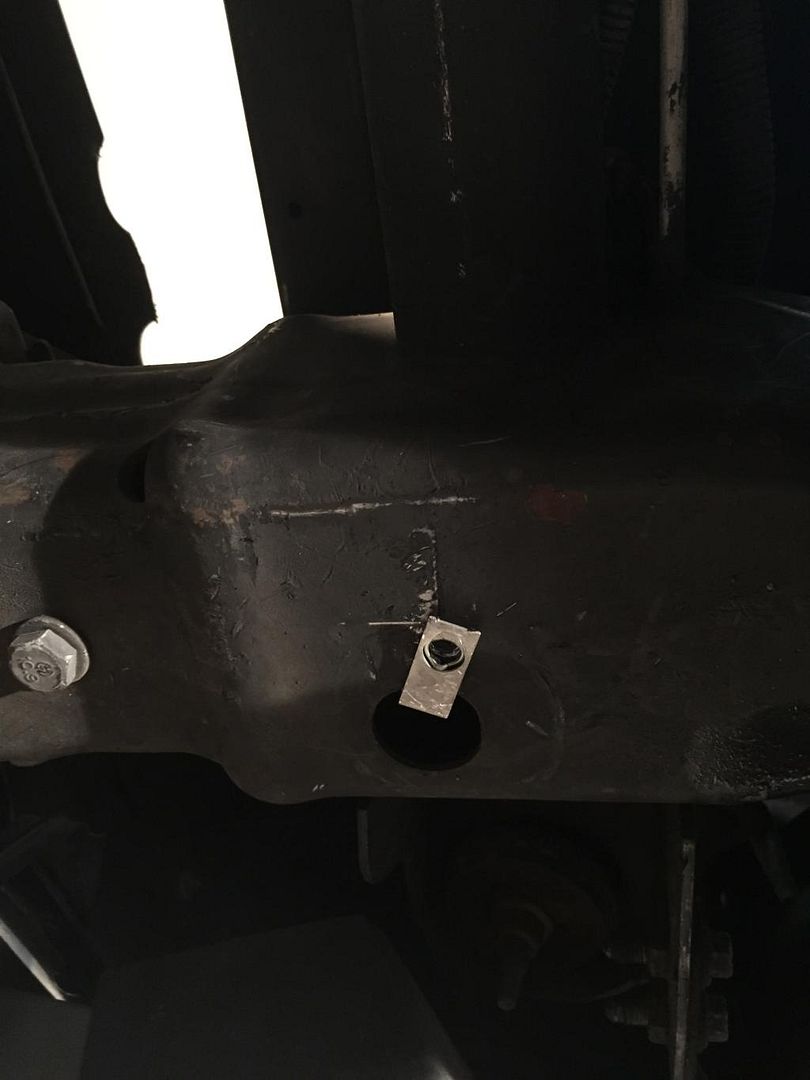
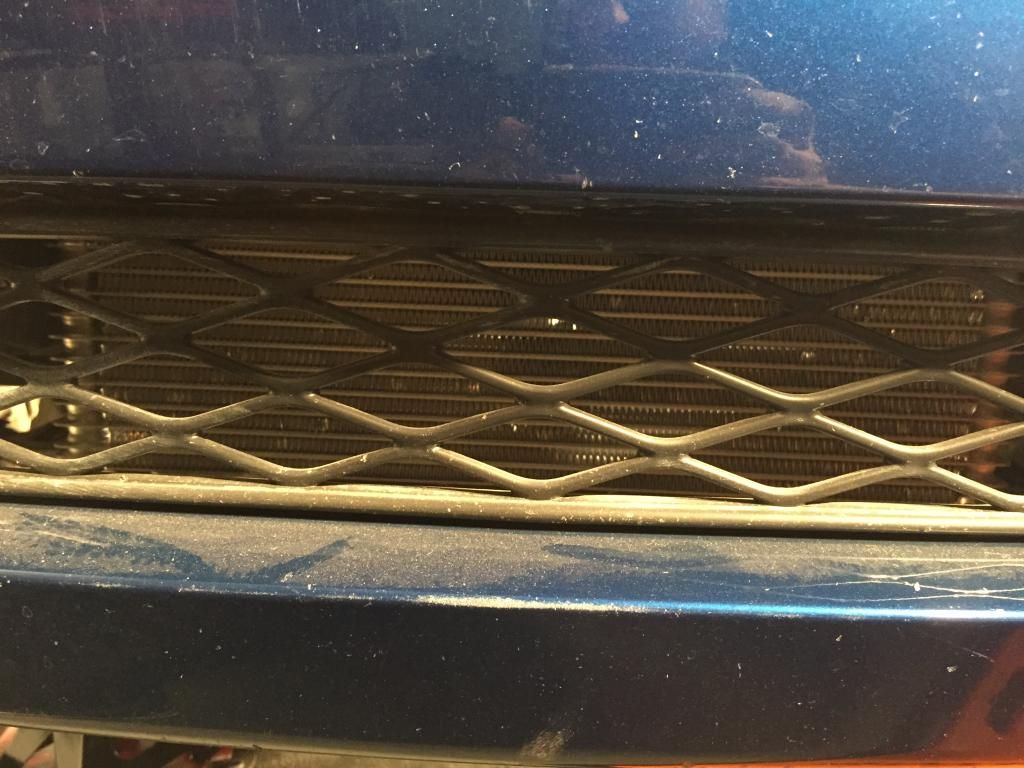
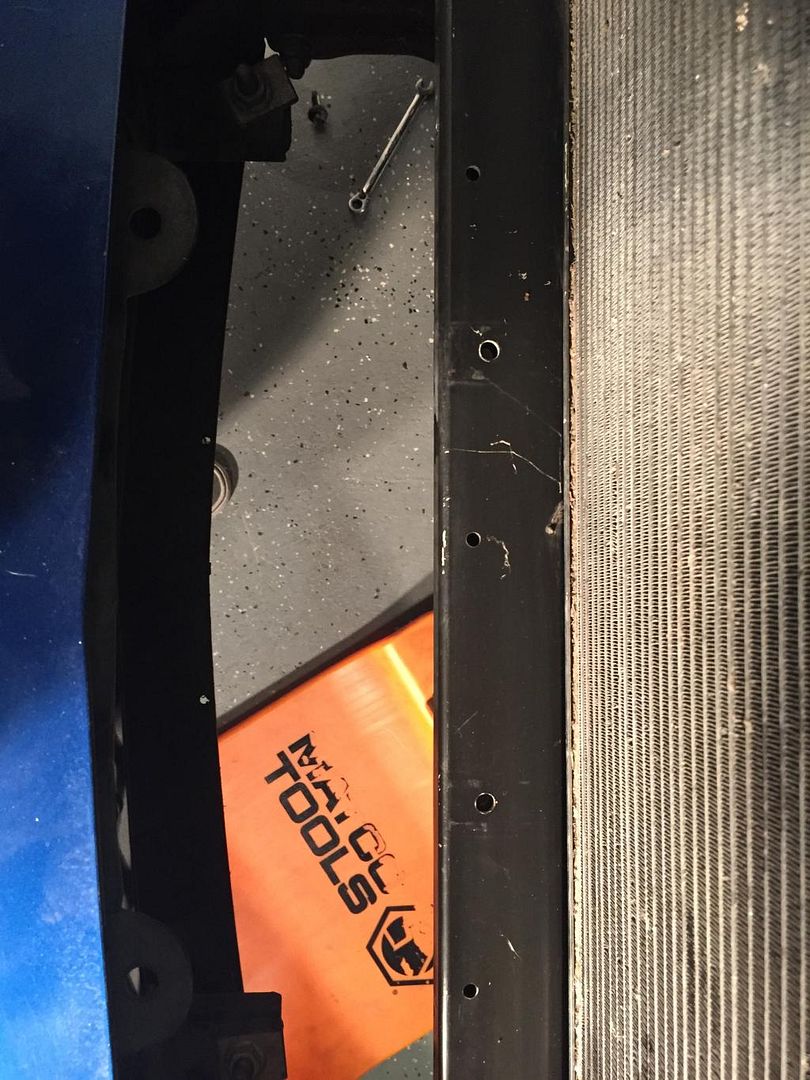
The bracket is meant to bolt to where the tow hooks go, however, this makes the cooler sit too far forward. With my Fluidyne cooler also going up front, I needed all the room I could get. Also. this placement requires some modification to the bumper bracket. So I drilled a few holes and used a speed clip to attach it a little further back.
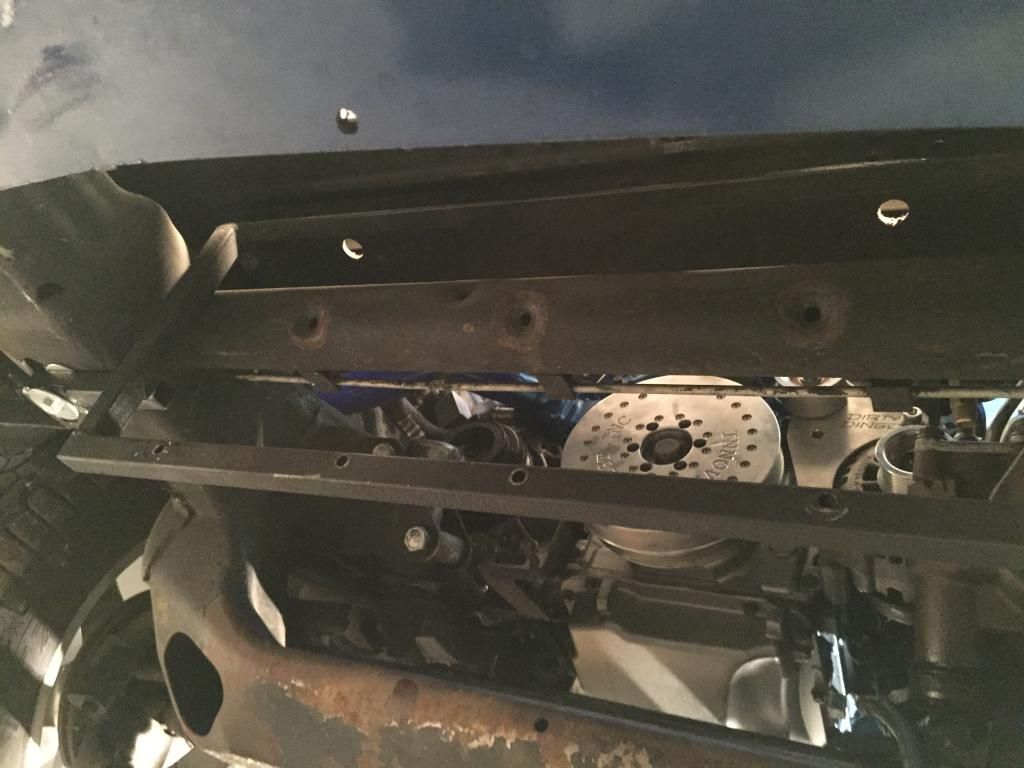

The cooler mounted... It gets plenty of air through the lower bumper vent
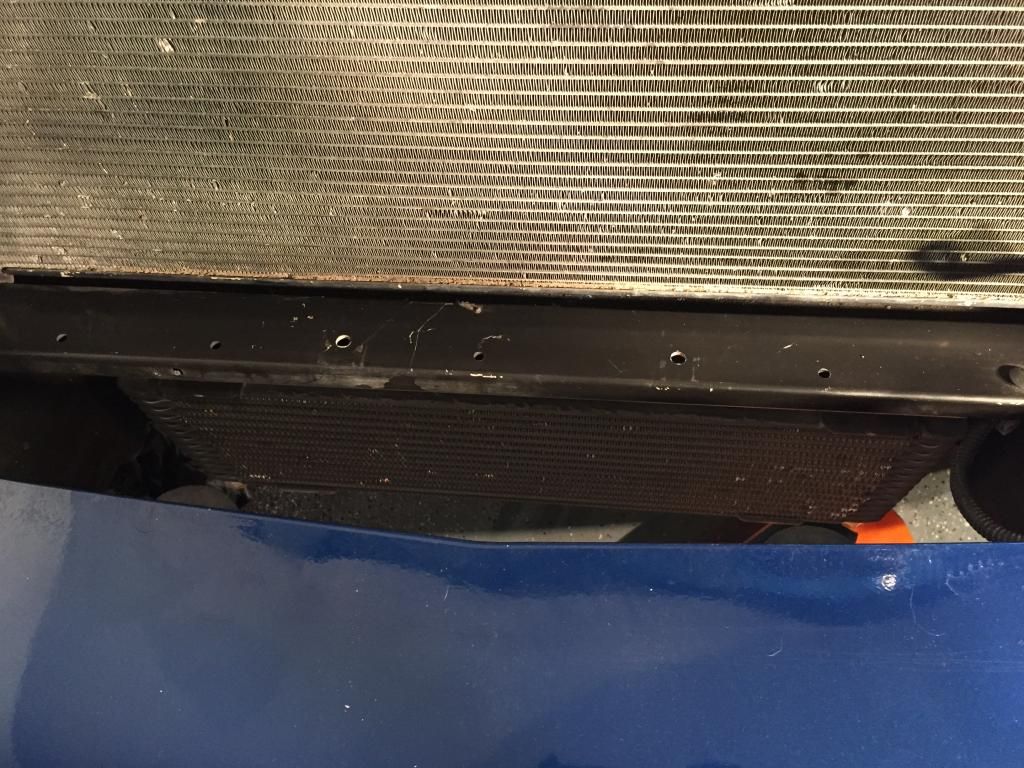
And plenty of room yet up front.
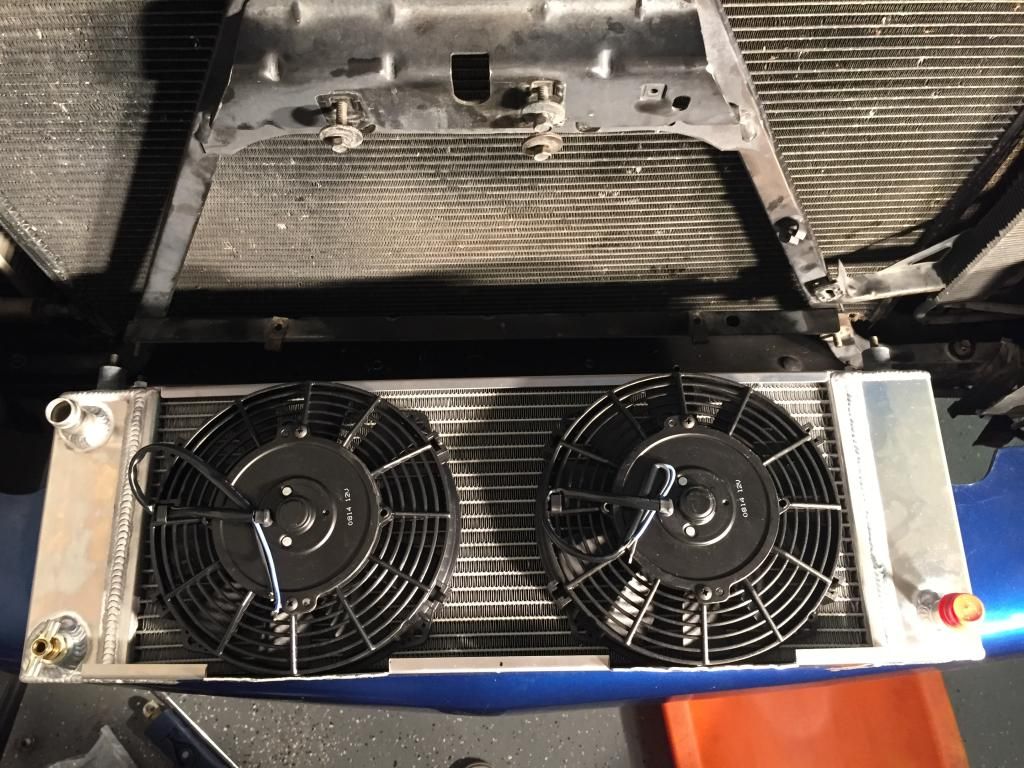
Modified the Fluidyne a little to accommodate the dual fans.

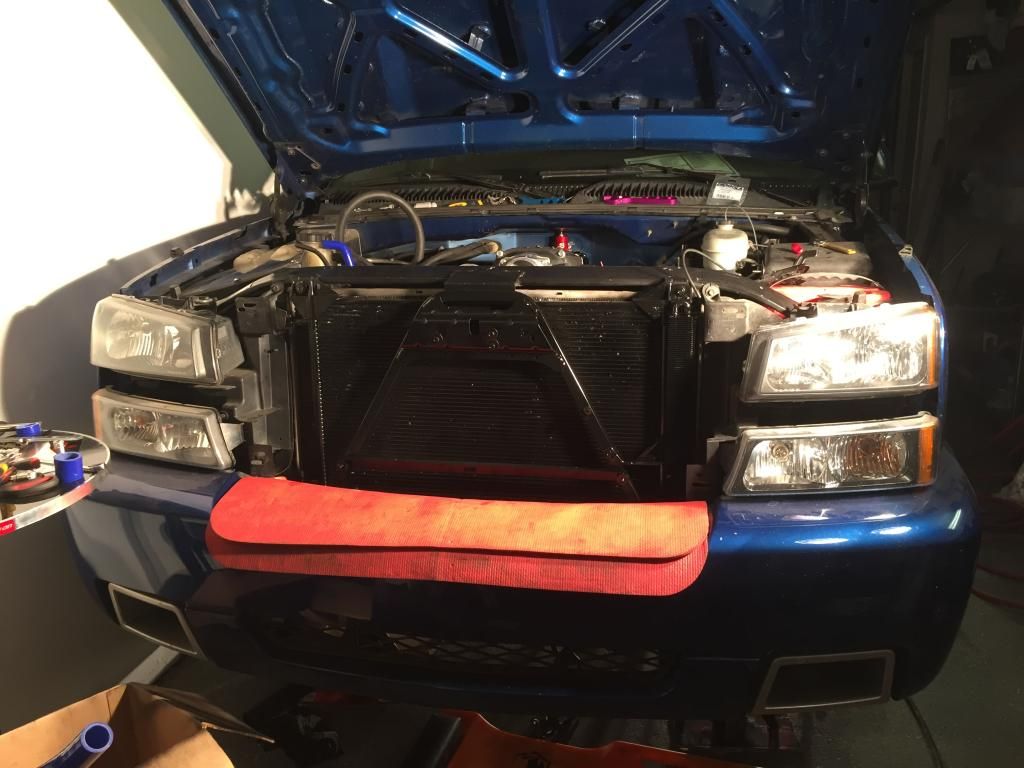
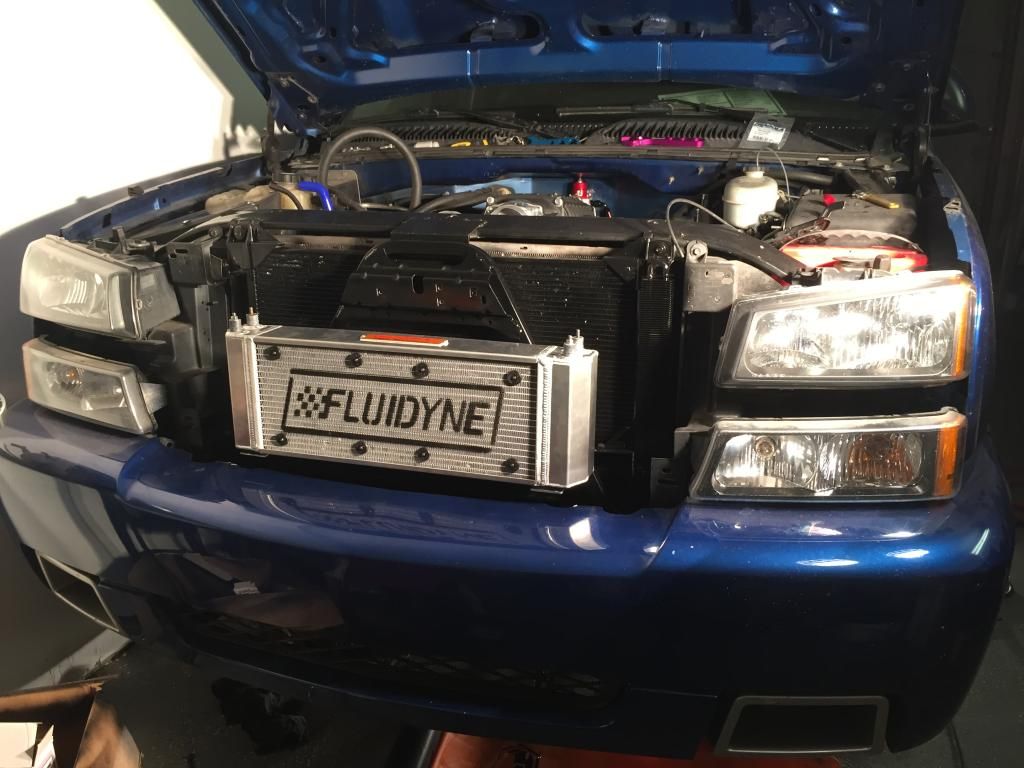
Did a little painting up front while it was all gutted. Just to clean it up a bit.
I bolted some aluminum brackets to the factory brace to use as mounts..

Fans mounted up..
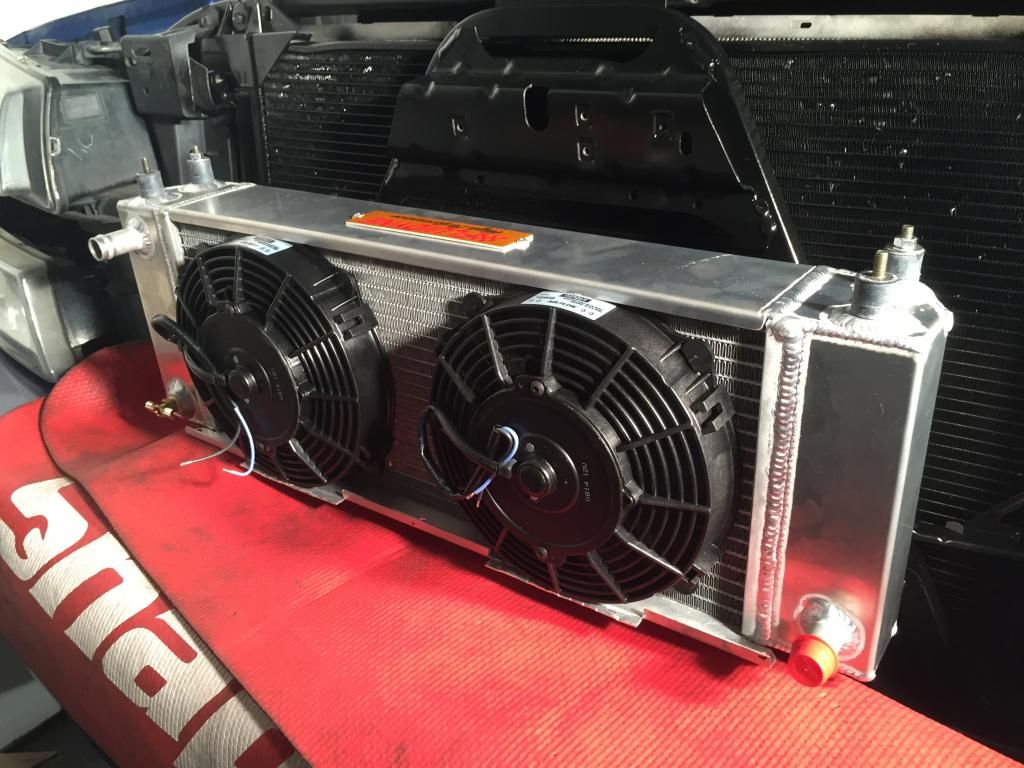
Used the through-ties supplied with the fans. Was kind of upset that I messed up on the 3rd one over on the top and it turned out out crooked.. But oh well. You'll never see it I guess. Maybe ill order up another tie kit and fix it later.
Here it is all bolted up.
-
AWESOME work. Thank you so much for taking the initiative to do this and finally satisfy the demand for these things!!
 Ill be buying one in a few months for sure. Post these up on Performancetrucks.net as well. They'll sell like hotcakes.. Just keep one on the shelf for me!
 -
Yeah. That droopy bumper look used to drive me nuts.
-
-
Well, I tried to use the search bar to locate some older threads, but they weren't coming up. Not sure if the search function is working correctly. I noticed that my "view new content" button was also acting strange. I have been having to use google to locate old threads, because the search function was just bringing up recent threads.. Anyway, I had to dig through pages of my content to find some old threads I wanted to revisit. I stumbled across this and figured I'd give it a bump for all the new members.
-
Wow. So the aluminum would get eaten huh? I take it they'll anodize the rails inside and out then? That blue should look really good. Set it off nice. Yeah there a thread about E85/alternative fuels etc.. I was under the impression that you needed special o-rings, plastic, etc throughout the entire fuel system as the fuel will eat silicone, rubber, etc. I know all the flex fuel fords have all steel lines and special high volume pumps, high flow injectors, regulators, lifetime filters and all sorts of crap to make it work. Kinda curious how guys on stock/mild fuel systems are filling up with E85...
Anyway, glad the trans is in! You don't waste any time do ya?
 I'm much slower since I'm doing it all on the floor of my 1 car garage by my lonesome. Lol. Keep us updated with everything. Very excited to see the new cooler installed. That coolant pump is badass too. I'm anxious to see how mine does. Gonna try to mount mine just right so you can see "Fluidyne" through the grille. Haha
 -
-
Yes. I bought the kit through summit. The kit I bought is kind of cheesy though. It comes with four 90 degree fittings and some rubber hose. That's it. I had to buy the actual steam fittings that bolt to the head separately. But I think they offer a better kit that comes with everything for like $100.Brandon I have r would questions for you.
1- will the steam vent kit clear the cogs and pullies on the tvs unit?
2-Did you purchase the kit through Summitt?
The fittings and hoses should clear the cogs with no problem. The Camaro blower sits really far forward since it was intended for the very low firewall of the Camaro. This gives me lots of room behind it. The truck 2300 sits much further back and there isn't much room at all. I'm not sure if you'd be able to use this kit with the truck blower, but you could definitely come up with something to make the steam vent system work.
-
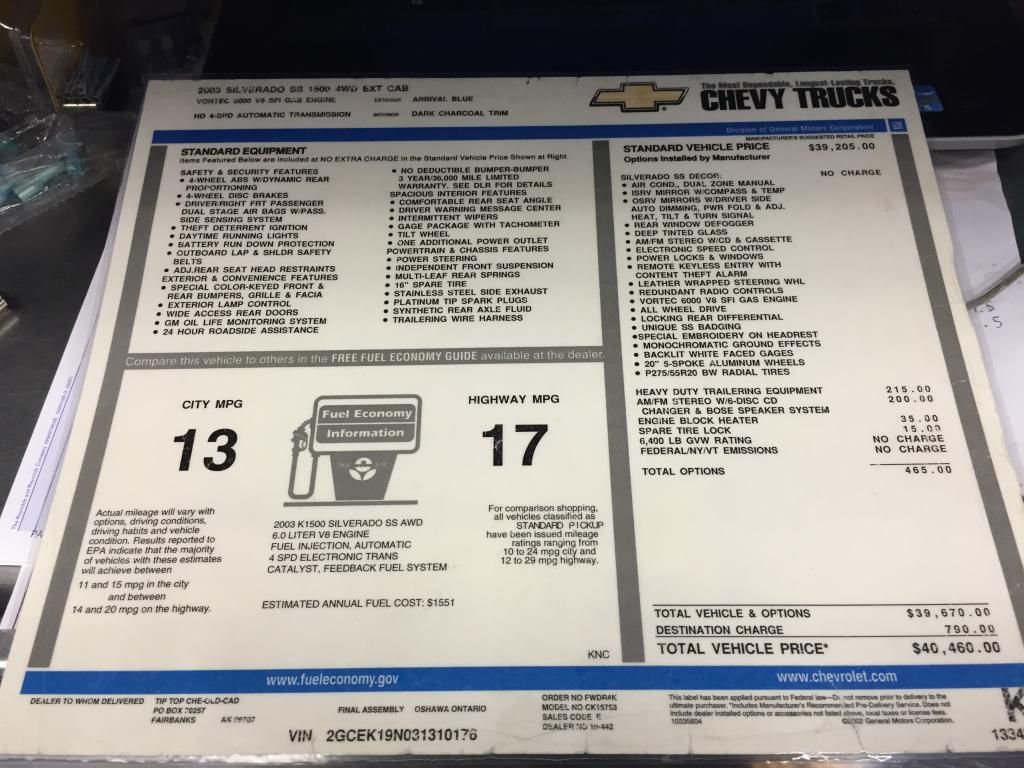
I like the window sticker lamination! That is a good idea, I have mine stored in a folder but I like the idea of laminating it so it can be saved for a long time.
Yeah. Mine was stored in a folder too and the edges still got roughed up a bit. Laminating it will ensure it lasts forever. Got the idea from a car show in Chicago. Guy had a 700hp challenger srt8 and he had the window sticker laminated and laid up on the dash. He also had a little poster board with all the car specs and some track trophies set up around the car too. Kinda cool.
-
Also got this guy laminated. Turned out pretty good. Now hopefully Itll last as long as the truck. Kinda neat to have...
-
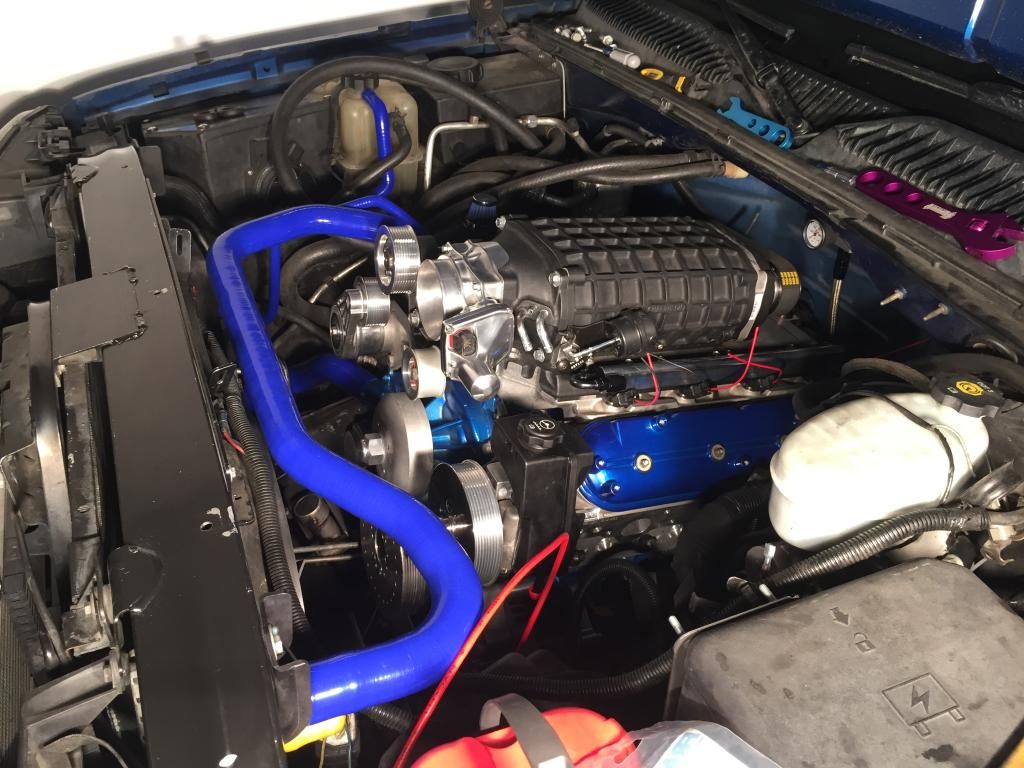
Just received my steam fittings... These replace the front crossover pipe and the rear caps.
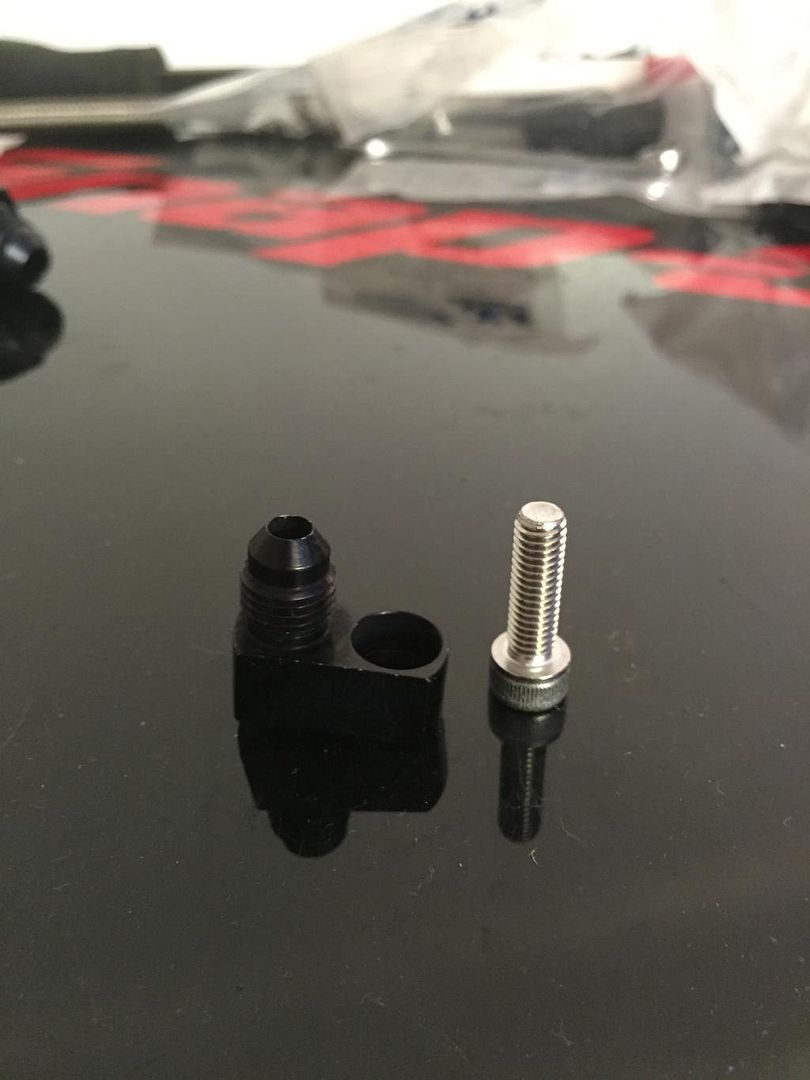
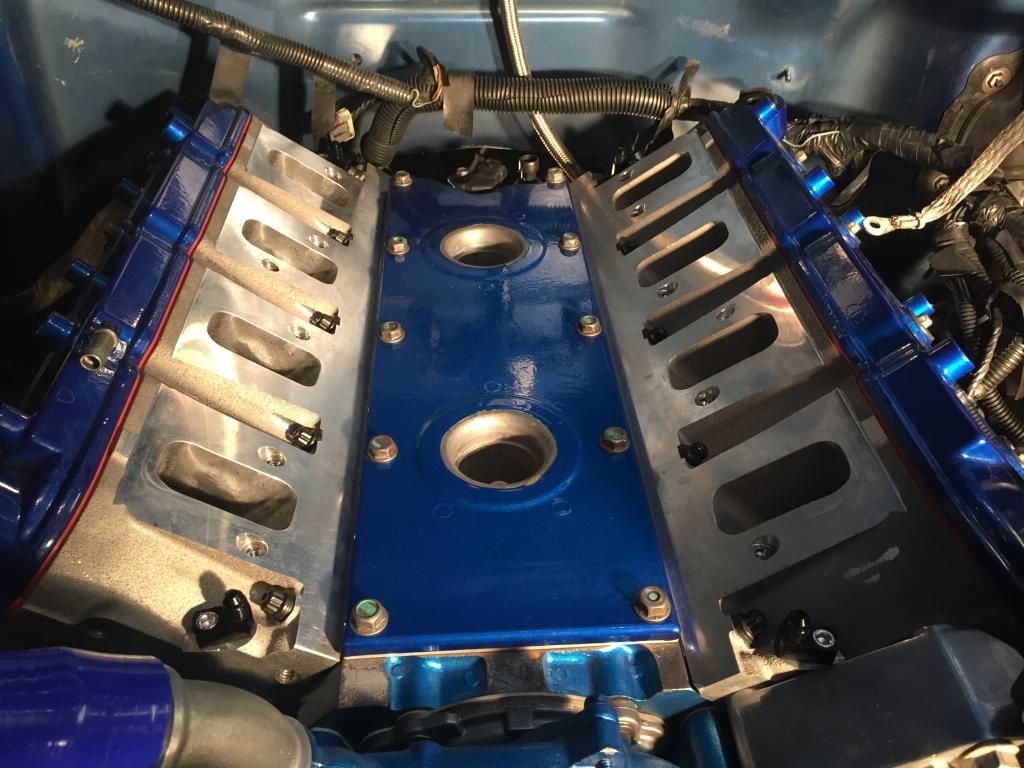
From factory, the rear steam fittings are capped off, and this causes lots of heat to stay trapped in the head. Especially if there is any air in your cooling system. The hot steam travels to the highest point and gets trapped. That steam bubble gets hotter and hotter with no where to go and can cause major issues. To solve this, trick flow makes a kit to vent all 4 corners of the head back to the radiator or coolant reservoir... The supercharger was just sitting on top so I could mock up my fuel lines, so I pulled that and set it on the bench. Heres all 4 fittings installed.
And now I have a use for the -4 summit sent me instead of the -6 I ordered.

All said and done, itll look remotely like this.. I plan on doing it slightly different though.
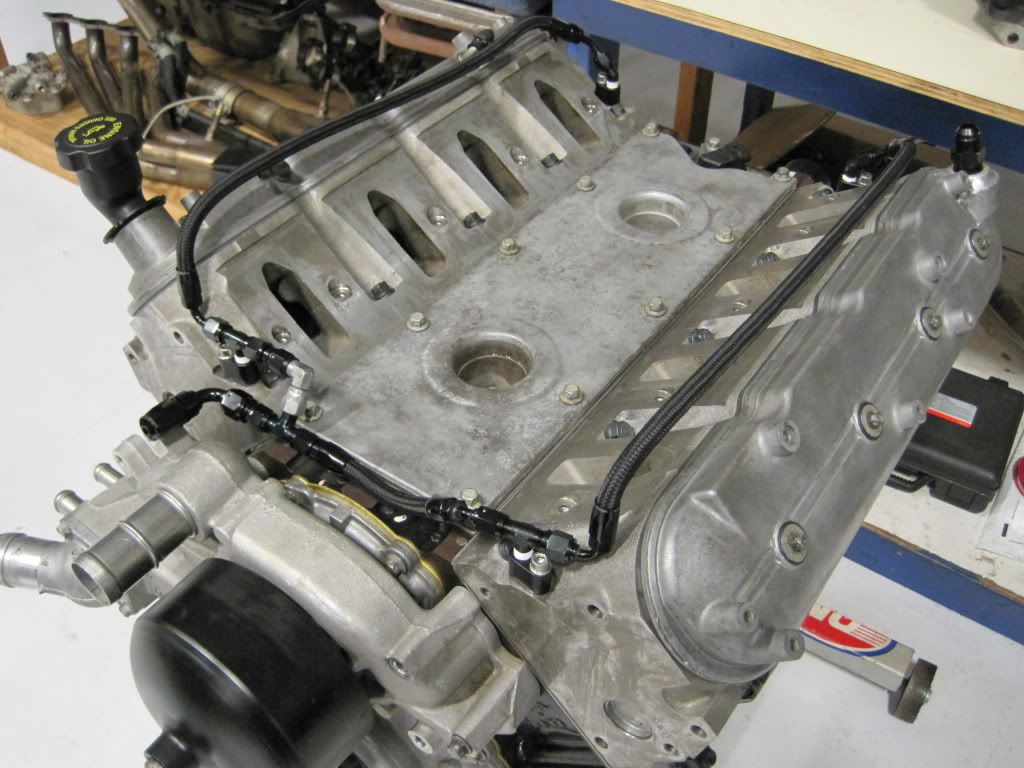
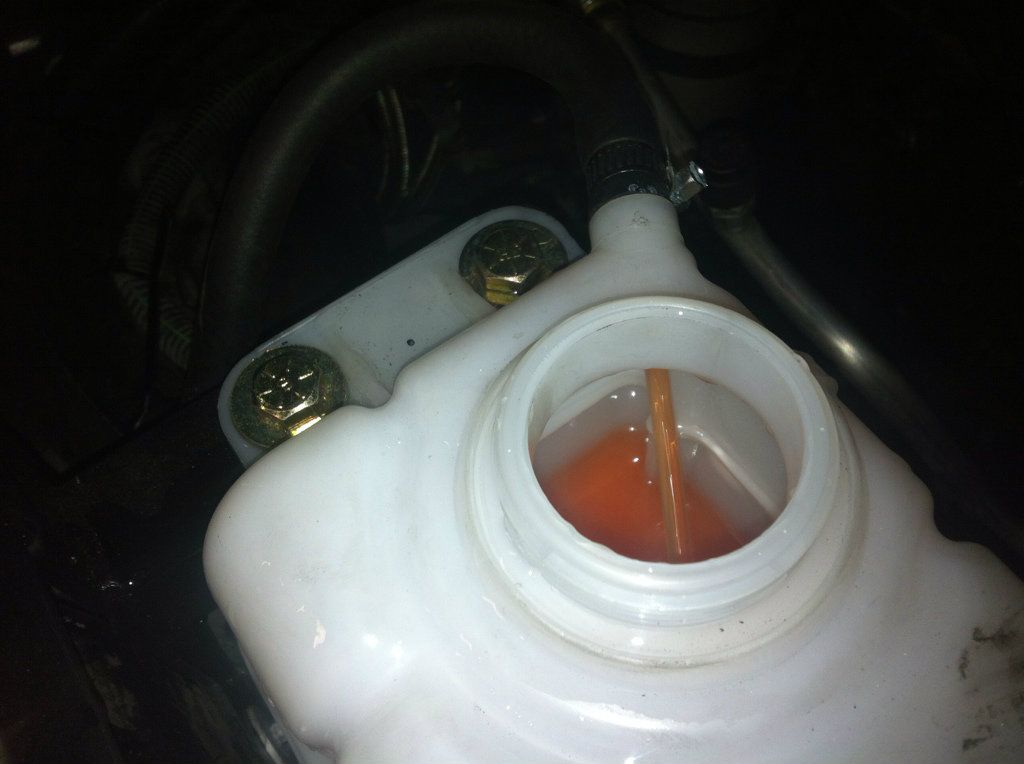
Heres a pic of how much coolant gets pumped through the fittings. Really helps with removing heat from the heads.
While I had the blower on the bench, I topped off the supercharger oil, and im going to go ahead an put new bearings in the jackshaft. I was told the blower only had 5k miles on it, but you never know. Id hate to put this all together, then have the bearings start making noise and have to tear into it again. They were a little noisy when spun by hand, but not too bad.
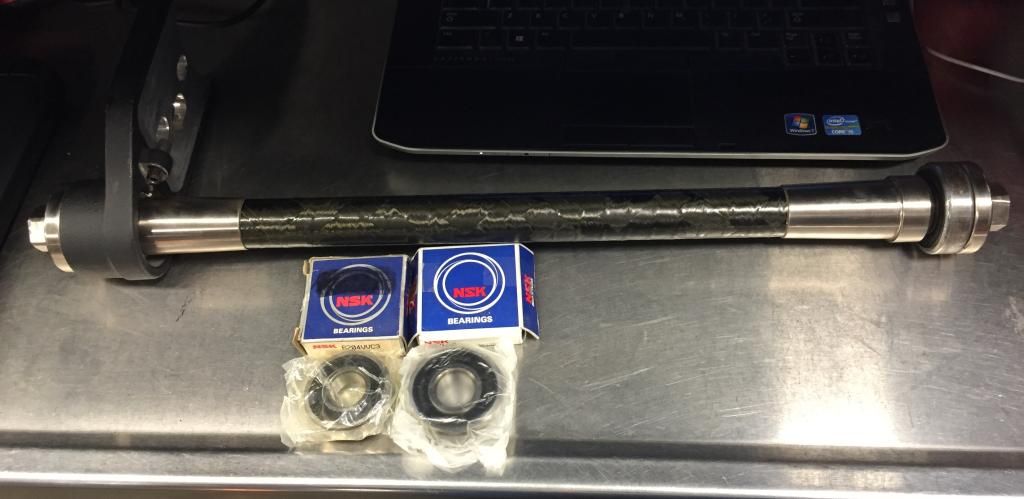
Im going to complete my wiring to the knock sensors, and reassemble the blower. The next time the blower goes on, itll be for good. Ill bolt it down and move forward. This weekend id like to have the fuel system done, minus the filter im still waiting on.. And have my coolers mounted. Then ill plumb all my cooling hoses and start wiring everything up. My converter is scheduled to be delivered Monday, so the trans will be another week or so..
-
Eh. Just an idea. To each their own I guess..
-
Quality is great, but these are not flush mount covers which have their bennys and downfalls. I am hoping to rid my custom flushmount for one of these to cover the over the bed rails (they have stake pockets). Just want something to cover the entire bed.
 I1413245393.jpg
Yeah. I really like how the speedsturr covers the bed stake holes. And water runs right over the sides and off the cover. I'm sure you could sell that flush mount in a heartbeat for a small fortune though. They're getting hard to find. Seen one go for $900 on CL up here.
-
Just shave it off entirely like the cool guys do.

-
Damn...
 Those chrome 20s sure would look nice on my ride.. Hmmm....
 -
I think these hoses are gonna set it off nicely.
-
I've got it... I'll get a shell of an MSD ignition box to cover the regulator on track days. Then loom the fuel lines with wire loom... They'll never know
-
yup have for years actually bought my truck from a dodge dealer lol u still work for ford?
Yeah... Unfortunately.
-
Well hell yeah, it's your truck and building it how you want to is what it's all about, right? ...maybe just leave a little slack in your lines just in case you change your mind somewhere down the road, haha!
Lol. Yeah. Ill just cross that bridge when I get there.
Ill just leave it where its at and keep moving forward with the build. Hoping Summit will pull through and have my parts here by the weekend. The filters were being drop shipped directly from fuelab, and I haven't gotten a ship notification from them yet. But as long as my -6, and my steam fittings show up, ill have plenty to do this weekend. Precision also shipped my new converter today. So fingers crossed ill have my trans in the following weekend.
 This weekend I need to focus on pulling my bumper and getting my coolers mounted. Then I can get all my cooling hoses routed and plumbed up. Harley is getting anxious to install his MP112, so we'll be doing that soon too. Hoping that by mid April, Justins, Harleys, and my truck will all be done. The roads will still be super muddy from break-up season, but shortly after we'll be ready to cruise and see what these things will do... That is, if I don't get unmotivated again and push it off another year.
-
HahahahaScreenshot_2015-03-04-17-53-30.pngGive phatman a call and let him customize your truck!

-
Think I'll just say F it and go with the current location for the FPR. I'll put a scatter shield on the bell housing for my own protection, but the way I look at it... I'll never pass tech inspection anyway. If this truck gets anywhere close to my goal track time, they're going to want to see a cage, harness, etc., which this truck will never see. So, I guess I'll make it look as clean as I can, and fast as I can. It's a street truck anyway... Right?
-
I found the NHRA article regarding the FPR on the firewall. It must be 6" forward of the flex plate. They're main concern is a flex plate coming apart, and shrapnel hitting fuel components. All fuel lines that pass the bell housing must be steel braided. "No brake or fuel components may be mounted on the firewall"... I guess they forgot that the brake booster is on the firewall and brake lines pass the bell housing. IMO, if my flex plate comes apart and rips through my bell housing, I have bigger problems. Like how I'm going to reattach my foot...
I wonder if they'd honor a good scatter shield over the bell housing... I did an image search of some SS trucks to see where they put their FPRs. Krambo, chase, a few trucks in truckin and GMP magazine... Even the local trucks like Justin (and myself)... All on the firewall. I don't know. I think it'll look haggard having to run fuel lines all the way to my fuse box, if I mount it there to be NHRA legal. I think the finished product of where it's at will look real clean... Idk. I guess it doesn't matter if I try to make sense of it all. Rules are rules. Anyone got pics of where they mounted their FPR? I could screw it right in to the end of the rail... But I just think it looks gay.
-
-
Saw some on a local CL if you want me to check em out.


MID12sSSS TVS2300 370 build
in Builds
Posted
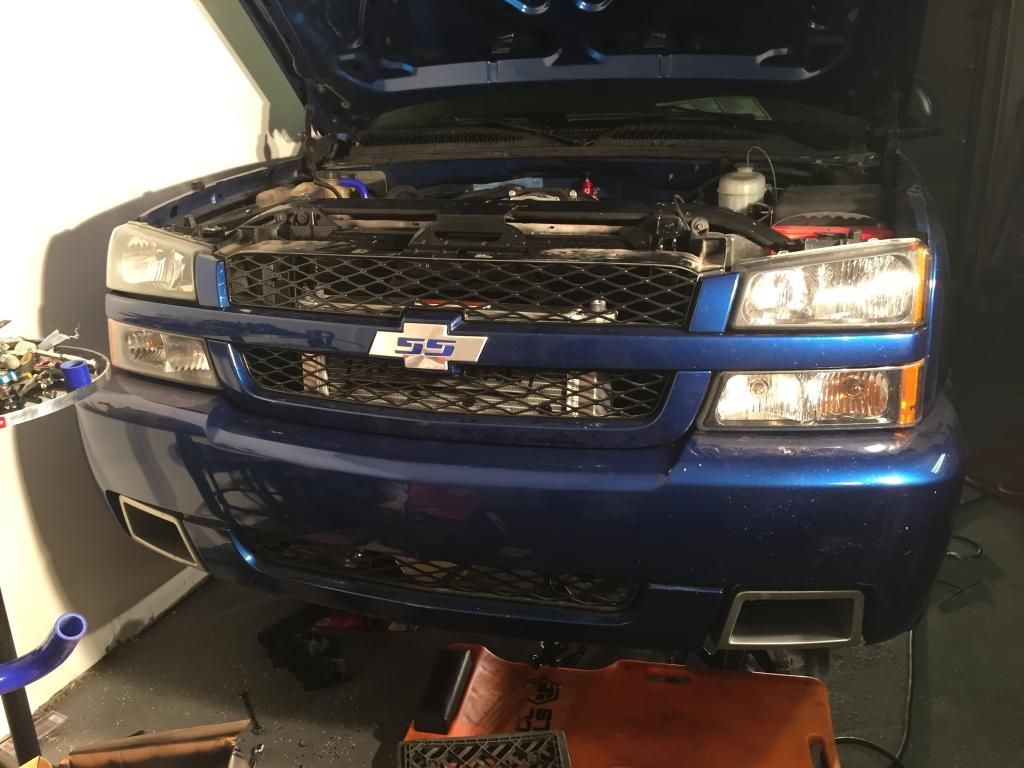
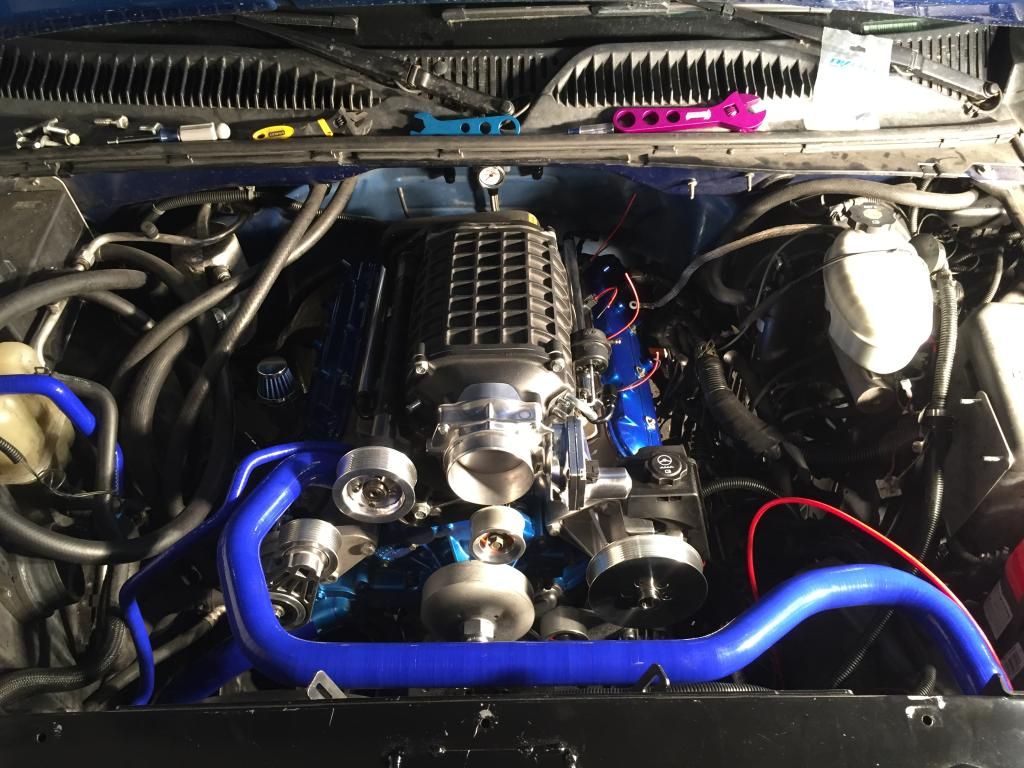
Tomorrow Im going to lower cooler a little with some spacers on the bracket to center "fluidyne" in the lower grille. Also, the fan ties will be hidden completely behind the bowtie and the lower part of the grille. Should make it look really clean.. On a side note, I cant wait to get this thing repainted this summer. All these rock chips drive me nuts... But one thing at a time I guess.
More plans for tomorrow. Will hopefully get the steam vent system finished up. Gotta pick up some more fittings. Also if I have time, im going to start cleaning up the wiring under the hood. Got some more parts showing up on Monday so I can keep plugging away. Anxious to get this thing done... More updates tomorrow.